Empowering the Next Generation of Women in Audio

Join Us

Music Reading for Drama Technicians

This month’s blog will go over some basic music theory concepts that I have found useful in my work as a musical theatre mixer. Full credit for the title goes to Professor Thomas W. Douglas of Carnegie Mellon University, who taught a class by that name when I was an undergrad. I know that not everyone working in theatrical sound has a formal music education (and I am not suggesting that it’s a requirement) but I think that being able to understand what is going on in a score, follow along in the music, and in some cases, line-by-line mix from the score, are good skills for anyone in this field to have.


Part 1: From the Top


Here’s a full-size cheat sheet of music theory 101! Courtesy of Thomas W. Douglas.

As with any piece of writing, the most important information about a score is at the top of the page. This first set of symbols gives you a roadmap for what the song should sound like and how it should feel when played. Some of that basic information includes:

Tempo: the “speed” of a song. Sometimes delineated in Italian terms ranging from the slowest (largo) to fastest (prestissimo). Often in modern shows, and especially new musicals, you will see more descriptive tempo terms such as “steady rock beat” or “upbeat.” Some of the tempo descriptions for the new musical I am currently mixing include “bluesy protest song,” “Dylanesque,” “pop 4,” “feverish,” and my personal favorite, “Tempo di ‘Four Seasons.’” Also common in modern and new musicals is a specific bpm marking, e.g., “quarter note = 120.” This is often included even on songs that aren’t played to a click, just to give a specific sense of how the tune should feel.

Time signature: the “meter” of the song. Shown as two stacked numbers, with the top number representing the number of beats in a measure (or bar) of music, and the bottom one showing what note counts as 1 beat. So, in 4/4 time, 4 quarter notes, or any other combination of notes adding up to 4 quarter notes (such as 2 half notes), makes 1 bar of music. Since 4/4 is overwhelmingly the most common time signature, it is often abbreviated by just writing a “C” for “common time.” Additionally, time changes within the same song are more common in show tunes than in pop music, as they can be helpful ways to revisit motifs from previous songs or highlight a shift in plot, mood, or tension.

Key signature: what “scale” the piece is in (or at least, much like tempo and time signature, what key the song starts in.) A good way to learn key signatures is by studying the “Circle of Fifths” (https://en.wikipedia.org/wiki/Circle_of_fifths), and learning the shortcuts to analyzing sharps and flats to quickly discern a key. The “signs” section in the graphic above shows the symbols for sharp, flat, and natural.


Clefs: what note range this part is written in. Most vocal parts for musical theatre are written in treble clef or G clef. A piano-vocal score (or PV) for a show will have the vocal lines in treble clef (sometimes with bass parts shown in treble clef 8vb, meaning that the notes are written in treble clef but should be sung down an octave), and then treble and bass clef lines for the piano part.


Part 2: Following Along in a Score

While plenty of music, both classical and pop, contains a common set of musical conventions, there are some things that I specifically look for when analyzing a musical theatre score. Some of those things are:

Repeats, Codas, Vamps, and Safeties

Repeats are exactly what they sound like: a section of music played through twice (or more times if indicated, but always a specific number of times). See the above glossary for a picture of the repeat symbols in music notation. Repeats can be useful when a song has a clear verse and chorus that are melodically identical, therefore the copyist can just write them into the music once (with both sets of lyrics under the vocal line) and delineate the first and second endings instead of writing the whole figure out twice.

Another thing that repeats allow for is Codas. A coda is the “tail” of a piece and is only played the last time through a repeated piece. When a piece of music says “D.C al Coda” this means “play the piece through as many times as the repeats indicate, but on the final time through, skip ahead to the Coda where the music indicates to do so.” Coda markings look kind of like a set of crosshairs and are often accompanied by the words “to coda” or “al coda”.

What about vamps? Romanbenedict.com defines a vamp as “a section of music that is repeated several times while dialogue or onstage action occurs. It is usually directed by the conductor’s cue, and as such can cope with the unpredictability of long stretches of dialogue or indeterminable theatrical machinations.” Vamps might be used when a song has a scene break in the middle of it because, while an 8-bar section of music always takes roughly the same amount of time to play, the pacing of the script (or the speed of a scenic transition) is not so precisely timed and may vary in length from night to night. The cue to move out of the vamp could be a certain line of dialogue or a scene change completing and will be clearly cued by the music director. It’s good to know where the vamps are in a musical number so that you can keep track of where you are in the song and not accidentally miss a pickup, band move, or a snapshot.

Safeties can be thought of as “optional” vamps, meaning that they could be played or skipped entirely based on timing variations from performance to performance.

Dynamics: Dynamics, as we learn in audio, are variations in loudness. Similarly, in music, dynamic descriptions tell us where this piece of music lands on the soft-to-loud, or in this case, “piano” to “forte” spectrum. In scores, you will find dynamics abbreviated using p for “piano” aka soft, f for “forte” aka loud, and m for “mezzo” or moderately (used in combination with p or f such as mp or mf).

Changes in dynamics: the Italian terms for these are crescendo and decrescendo. A crescendo is a gradual increase in volume and decrescendo means a gradual decrease. They are written either as the abbreviation “cresc.” Or, more commonly, by putting an elongated “<” or >” symbol under the bars of music encompassing the duration of the dynamic shift. There may also be an indication of what dynamic you are moving to or from (such as p<f, meaning crescendo from piano to forte), but this is optional. Crescendo markings are one of my favorite shorthand symbols to use in my mix scripts, so rather than write out “fade band up to -8” I will simply write “B<-8”. I also often use crescendo markings at the end of songs to indicate a big band build, or decrescendo markings on the first lyric after the intro to indicate a small band decrease when the vocal starts.

Changes in tempo: there are a lot of Italian terms for slowing a tempo down; the most common one is ritardando, often abbreviated as “rit.” Other terms include rallantando (rall. for short), or “moso” which means movement, and can have further elaboration such as piu moso (a little faster) or meno moso (a little slower).

Key changes: also called modulations. These can be everywhere in musical theatre but are most common in the final verse of a song, where the music and action take a big emotional shift. You will know there is a key change because in the middle of the music there will be a new key signature that now supersedes the original key for the remainder of the song (until you get to the next key change).

Rubato: this means played freely, without a clear tempo.

Fermata: a long-held note, often at the end of a song as part of the “big finish.”

Button: Buttons aren’t necessarily explicitly defined in the music, but they’re hard to miss. A clean, 1-beat ending to a song. Here is a great thread from Lin-Manuel Miranda explaining the emotional intent of buttons and why some songs do or don’t have them: https://twitter.com/lin_manuel/status/951215051633037312

Pickup note(s): this is when a song begins with an incomplete measure of music. For an example of a pickup, we can revisit the opening of Les Misérables which I dissected in part 1. The song begins with an eighth-note pickup, such that melodically the music starts on the “and” of the 4th beat of the 0th measure.


The circled notes are the pickup and first beat.

Part 3: Putting it together

Now armed with the tools to read a score more clearly, the next step is to apply your music theory in action as a mixer!

When should you opt to mix using a PV instead of a script? The answer is “it depends.” Also, the decision to mix from a score does not have to be universal but can be decided on a song-by-song basis.

There are many reasons to use score or not, such as personal preference, designer preference, lack of access to an updated or well-formatted script, and many more. But basically, as always, it comes down to picking the best tool for the job, the job in this case mixing this number of the musical.

So, for a real-world case study, here are some example PV pages for “Finale Ultimo” from my mix script for The Drowsy Chaperone, which I chose to mix on the score for ease of clarity in making the pickups for the layered vocal parts that flow in and out as the main character, The Man in the Chair, sings the melody. This section of PV matches up to approximately 0:30-1:39 in the recording from the cast album linked below.


I hope this blog has made you a little more musically “street-smart” and as always, feel free to reach out to me with any questions or suggestions for future blog topics!


Shop Prep 101


One of the biggest things I had to learn about when I moved from working in regional theatre to working in NYC was the process of shop prep (also called “shop build” or just “build”). It’s a phase of the production process that is kind of particular and unique to doing theatre here, and there is a lot to learn and money to be made doing this kind of work. Almost everyone who works as an A1, A2, or audio stagehand in NYC takes shop calls from time to time, sometimes for shows that they are mixing or A2ing, and sometimes as an additional hand on another show’s shop prep. It’s not uncommon for a sound stagehand to be building one show during the day and running another one at night (though “double-dipping” like this can get exhausting quickly). So, for this blog, I thought I would provide some basic information about shops and shop prep: what it is, who will be there, what goes on there, and a few other things that I wish I had known before showing up more or less clueless at my first shop build in January of 2019.

Part 1: Definitions

What is shop prep?

Shop prep is the part of the production process where all the audio gear that the designer has specified for the show is assembled, labeled, and tested. It takes place before the load-in period, and the goal is to get the sound design package ready to be installed in the theatre.

Why do NYC shows do shop preps?

Unlike most regional theatres, Broadway (and many off-Broadway) houses do not own any gear of their own. Everything the show needs from every department is brought in on a per-show basis and spec’d by the respective designers, especially for use on that show. Rather than purchase expensive new gear for every new Broadway show that comes to town, practically all the audio gear (including cable) is rented from one of the 3 major NYC-area audio rental shops for a weekly fee that is paid to the shop by the producers. Prior to shop prep, the sound designer, production manager, and producers will often go through a bidding process to see which of these 3 shops can fulfill the order closest to what the designer wants and what the producers have budgeted for.

Does every show do a shop prep?

With very few exceptions, every Broadway show and most touring shows will do a shop prep process. Many Off-Broadway shows do a shop prep as well, though some own enough gear that the sound designer can put together the desired system using the venue’s “rep system” or gear that the venue already owns. Some regional productions will also do a shop prep, particularly if the show that they are mounting is a “pre-Broadway Tryout” aka a show doing a run out of town before hopefully moving to NYC. In both Off-Broadway and regional theatre, sometimes a venue’s existing gear will be supplemented by a shop rental, which may or may not be complex enough for the show to need to send a team of workers for a proper shop prep. This is often the case for venues that do mostly plays and therefore might not own the gear that they need for musicals, such as a large-format mixing console and wireless microphones.

What are the “Big 3” shops, and where are they located?

The “Big 3” shops that supply the audio gear for most Broadway and Off-Broadway shows are Masque Sound, Production Resource Group (PRG), and Sound Associates Inc (SAI). Masque and PRG are both in northern New Jersey, and Sound Associates is in Yonkers, NY, just north of The Bronx.

Part 2: Know Before You Go

Ok, I’ve booked my first ever shop prep! Where is the shop and how do I get there?

DISCLAIMER: this travel information is current as of March 2022, so check with a knowledgeable friend in case things have changed since then!

Masque Sound

Address: 21 E Union Ave, East Rutherford, NJ 07073

How to get there from NYC: If you don’t have a car (or a friend with a car), the NJTransit 163 bus from Port Authority Bus Terminal is the easiest way to get there. The bus lets out right by the Staples store on Union Avenue in East Rutherford, and the shop is just down the street from there.

IMPORTANT NOTE: for the morning commute, not every 163 Bus stops at the Staples! You must be on the one that leaves at either 7:40 am or 8:10 am. Look for other sound folks with Pelican cases at the bus station, and they will help you get to the right place.

How to get back: The bus is also an option for returning to NYC, but it’s much easier to walk to the East Rutherford train station and take the train to Secaucus. From there you can transfer to a train to Penn Station.

PRG

Address: 915 Secaucus Rd, Secaucus, NJ 07094

How to get there from NYC: Take the NJTransit 129 bus from Port Authority, Gate 314. You’ll want to make the 7:50 am bus if your build starts at 8:30 am. The bus stops right outside of PRG!

How to get back: The same bus will take you back to Port Authority from the same stop where you got off. But check the schedule because if you miss it the next one might not be for a while!

Sound Associates

Address: 979 Saw Mill River Rd, Yonkers, NY 10710

How to get there from NYC: A friend with a car will be your best bet here. Often shows will rent a car for the Production Audio to get to the build, so reach out and see if you can ride with them. There is a Metro-North train that goes from Grand Central Station to Yonkers (also you can take the subway most of the way there), but neither of these options leaves you within reasonable walking distance, so you will still have to take a cab or rideshare from there to the shop.

IMPORTANT NOTE: if you are driving to SAI from NYC, put “Star Auto Spa” (999 Saw Mill River Rd, Yonkers, NY 10710) in your GPS, not Sound Associates itself! The shop is literally right next to exit 9 on the northbound side of the Saw Mill River Parkway, but you must get off one exit earlier (at Exit 7 – Tuckahoe Rd) to actually get there. Otherwise, you will arrive at the off-ramp for exit 9 only to find that you are on the wrong side of the fence, and Google/Waze will think you have arrived at your destination when in fact you’ve gone too far.

IMPORTANT NOTE WHEN TRAVELING TO ANY OF THE SHOPS: many productions (particularly Off-Broadway) will reimburse your travel costs, so ask your Production Audio if this is the case on your show, and be sure to save your tickets and receipts!

Who all will be there?

On the show side, your team will likely consist of some combination of these people:

On the shop side, your main players are

What tools should I bring?

Most of what you need can be provided either by the production or by your fellow shop hands, so definitely don’t feel like you have to go spend all your money on nice tools before you’ve even gotten your first shop paycheck! That said, once you do a few builds you may find it nice to have your own tools for certain tasks. A great way to carry them is in a Pelican case, and you will see many sound folks bringing theirs into the zone on the first day of a build. But do whatever works for you and your budget. Perishables such as tape, tie line, and zip ties will be purchased by the production; there is no need to bring your own.

Here is a list of the tools and other accessories that I like to have on hand for shop use: screw gun (plus a variety of bits); multi-tool; crappy knife for cutting electrical tape without gunking up your good knife; good knife for non-electrical tape jobs; tape measure; crescent wrench,; headlamp; flush cutters for cutting zip ties; scissors; screwdriver; a good pair of work gloves; Allen keys; jeweler’s screwdrivers or other precision bit set; pens/pencils, P-Touch label maker; cable tester; BNC tool; and my personal favorite: knee pads (for when you’re stuck on the ground building a rack or holding something).


Here’s the inside of my Pelican case with most of the above-mentioned tools in it! My label-maker is in the red bag off to the side.


Part 3: Let’s Get to Work

Ok I’m at the shop! Now what?

Rather than describe the tasks of shop prep based on how much time they take, I find it helpful to think of the prep process in phases. Shop preps can vary drastically in duration, depending on the show’s budget, how big the rental package is, and how many crew members are available. Typically, a Broadway show or 1st national tour will spend 3-4 weeks in the shop, but some builds may go for even longer if there is a lot of specialty equipment and assembly needs. Smaller Broadway shows and off-Broadway shows might spend between 2 days and 2 weeks in shop prep, so it totally depends. But in most cases, there are some universal tasks that will need to be done, and usually, they go in this order:

Phase 1: Bundling, Labeling, Rack Building

When you arrive in your zone on the first day of your show’s prep, you will likely find a smattering of gear, some empty rack boxes, and lots of cable. To make the load-in process smoother and more efficient, a set of cables that runs from point A to point B (for example, from ampland to front of house) will be loomed together into a bundle. Every single cable will have a specific label, and most designers (or associate designers) will include spare runs for anything fragile like network and video cables. XLR runs will typically be done using G-block multi-cables, which come in varieties from 3-pair all the way up to 19-pair. The associate designer will have put together some version of a piece of paperwork called a “bundle sheet” which tells you the name of the bundle, what cables go in it, and, very importantly, which ends need to be grouped together so that no cable is run backwards! The associate designer will also sometimes generate cable labels using a database program such as FileMaker Pro. Many production audio people and associate designers have spent years putting together their databases to make this process easier for themselves and to avoid having to start from scratch on every new production they do.

A new-ish development in post-pandemic shop work is that show build crews are often doing the actual bundling of cables themselves. Some shows may pay to have the shops do the bundling for them, but this has not been the norm in 2022 in my personal experience. The act of bundling is done by flagging all the ends that begin at one origin (such as ampland) with colored gaff tape, then wrapping friction tape around the entire “girth” of the cable bundle every 3-ish feet, so that all the cables in the bundle can then be easily coiled up and run out together as though they were one very thick cable. It’s gonna feel like major “arm day” by the time you’re done, so prepare yourself. I personally recommend wearing long sleeves and gloves for when you’re laying out 250’ of cable and inevitably getting various dirt and schmutz all over yourself!

Here are some of the completed bundles for the Broadway production of “A Strange Loop.” This is a relatively small Broadway musical, but it still had 70+ bundles!


In most cases, the ends of a bundle will find themselves getting plugged into racks. Racks of gear will be designed on a per-show basis by the designer and associate designer and be articulated in a series of rack drawings. These can be made in software such as Vectorworks, Excel, OmniGraffle, or sometimes just sketched out by hand in a pinch.

Building racks means wrangling up all the gear that goes into that rack, screwing it into the slots where the drawing indicates that it should go, then elegantly labeling, running, and connecting the gear’s power supply (if applicable) and short cables known as interconnects that go between the front of the rack (where most of the gear is) and the back of the rack. On the rear side of the rack, you will usually add some sort of panel mount or Stek (brand name) panel with connector barrels on it that merge the bundle ends to the interconnect ends. That way once the crew in the theatre gets the bundles, all they have to do is plug the labeled ends into the back of the rack at the labeled ports without having to dig around inside the rack to find the right port for each connection.

“L: the rack drawing for the Deck Automation rack for the Broadway production of “A Strange Loop”. C&R: the finished rack viewed from front and rear! Rack drawing by Sam Schloegel.”


Phase 2: Testing

Once most of your racks and bundles are built, it’s time to move on to testing! Basically, this will involve setting up a mock layout of your show’s ampland in your prep bay, then running out all your bundles between ampland, Front of House, and the other various rack locations. Simultaneously, your A1 will likely be setting up a mock-up of the mix position, both building FOH racks and setting up the basic console file. Just about everything in your bay should be tested before being brought to the theatre in as close to “show conditions” as you can get it. So, for example, to test the conductor camera, you will plug it in near your mock band area, run the bundle that goes between it and ampland, run out any other bundles out from ampland that carry the conductor image to its various destinations, then plug in every video monitor to make sure you see the image. To keep things neat and clear, a common trick when testing cameras is to stick a post-it in front of the lens labeled with what the shot should be, that way when you have 4 monitors all next to each other you can easily diagnose which camera is “MD” vs “FOH IR” vs “LADDER 3” etc. Additionally, all wired inputs, band mics, monitor mixers such as Avioms, wired and wireless com, and program feed sends will be tested, plus any other equipment that is pertinent to your show’s design.


A big stack of com racks for tech rehearsals all ready to be tested!


Phase 3: Packing and Pushing

Finally, your build is coming to an end, and it is time to prepare the gear to be transported to the theatre for load-in! Racks will get packed into foam-lined rack surrounds with wheels so that nothing gets damaged on the journey. Hardware, such as mic stands and speaker yokes will usually get packed into gray road cases known simply as “greys.” Cable will get packed into road cases. Then your Production Audio will advise on where everything should be packed so that each road case can get pushed to the most relevant location upon arrival at the venue, and you aren’t carrying cable from one location to another excessively. Every box will have a box label with a box number, the contents of what’s in the box, and, for large shows, which truck the box goes on. This also helps streamline the load-in process so that things you need first, such as feeder cable, arrive before things you don’t need until later, such as spare cable.

Depending on the shop schedule, the shop may ask you to leave your boxes packed and labeled in your prep bay, or you may push them to the loading dock yourself before leaving on your last day. Whatever the case is, hopefully, you have set the show up for success so that when the truck arrives for the first day of load-in everything is ready to go!


Truck 3 for the Broadway production of “A Strange Loop” is lined up at the dock and ready to get packed!


I hope this article will help you feel less overwhelmed than I did at my first shop prep! Please feel free to reach out with any additional questions you have about this process. If there is interest, I would be happy to dive deeper into any aspect of shop prep in a future blog entry.


Saving the Show

We all like to think we’re absolutely indispensable, especially in the theatre world. There’s the old adage “the show must go on,” so we push ourselves to get tours into theatres where they barely fit, come to work even when we’re not feeling well because who else can run the show? Once, an actress asked what the A1 and A2 would do if one of us were sick. I told her that whoever’s not sick would mix the show, so she asked what happened if we were both sick. I replied, “then whoever’s less sick mixes with a trashcan at FOH.” Thankfully neither of us ever had to do that, but everyone on the road has a war story of doing a show despite illness or injury, bragging how quickly they came back or how stoically they soldiered through.

Trying to fit the old tour life we knew into a new landscape where Covid dictates so much have proven challenging to say the least. But some good has come from it: now more than ever, we’re focusing more on our physical health. Which is wonderful, and long overdue. However, sailing in uncharted waters leads to so much uncertainty in our lives. That constant stress takes a toll on the mental health of the company. We’re on rigorous testing schedules that race against the efficiency of an ever-evolving virus that threatens cancellations or unexpected layoffs if enough people in the company test positive. Before 2020 most of us would have cheered some unexpected time off and made plans to relax, but now there’s a nagging worry in the back of our minds that our entire industry could shut down again or our show could close for good. We find ourselves half tempted to stay locked in the hotel room in the hope that somehow that will keep a positive test at bay, all the while knowing that our quality of life will suffer drastically if we try to avoid each other completely.

We’re now at a point where being indispensable is a liability, not only to the company but to our own mental well-being. Even more so for the handful of company members who have become linchpins in a Covid world: people that, if they test positive and have to quarantine, have no replacement or understudy onsite to cover, and the show will have to shut down until they can return to work. In most cases, there’s someone, somewhere that could fly out to the tour to cover, but even that would involve at least one or two canceled shows.

At the beginning of January, I ran into both of those situations. Mean Girls had an outbreak of cases and had to cancel a week of shows, which had already happened on a handful of other tours. I found myself with some unexpected time off, but that didn’t last for long because our industry is a very small one. On my first day off, I got a call at 9 pm asking if I could leave on the first flight the next day so I could fill in for the A1 on the My Fair Lady tour, and Tuesday at 10 am I walked into load in to help the A2 get the show-up and running.

This was a job that brought a lot of perspectives. It was a d&b main system and Helixnet com, neither of which I’d toured, and a Yamaha PM10 console, which I’ve never touched before (I have worked on Yamaha consoles, and thankfully that knowledge of the software transferred!), plus a design team that I’d never worked with before. Walking in, I’d toured for long enough that I was able to get the general lay of the land, and the A2 and I worked through setting up FOH and getting the system timed with a few phone calls and emails to design and the A1 to make sure we had the right patches and were getting reasonably close to the original intention of the design.

It was gratifying to see that I’d come far enough in my career that I could take unfamiliar gear in stride or at least know who to ask for help. It also showed me the gap between what we know as someone who runs the show constantly, and what a fresh pair of eyes actually see. Taking that back with me to Mean Girls, I’m starting to covid-proof my system to the best of my ability. So far I’ve added better labeling and color-coding to my FOH setup, taking more pictures of what things look like, and creating a Dropbox folder that I can send someone a link with most of the pertinent information they’d need to load in, run, and load out the show.

Luckily, this leans into one of my strengths. If you threw a dart at a collection of my blogs, you’re almost guaranteed to hit one that either mentions or completely focuses on some kind of paperwork: scripts, console programming, venue advances; I love a solid set of paperwork and some detailed documentation.

One of my projects on the post-Covid version of the tour was creating documentation of the show and my stint at My Fair Lady gave me a better idea of what I want to include:

For some, this sounds like overkill, but I find peace of mind in the idea that I might give someone too much information, but hopefully never too little. I also have a lot of practice doing this kind of documentation because it’s similar to what I’ve done for some of the shows I’ve left, specifically those where I didn’t have much time with my replacement to help train them. The only difference is that this would be a temporary replacement with who I’d have absolutely no crossover, other than answering questions on the phone as I sit in a hotel room in quarantine.

At this point in the touring world, it’s no longer about job security, it’s about sustainability. Eventually, we may move to a point where Covid won’t shut shows down for weeks at a time, but we’re not there yet. Until we make it to that point, we all have to be prepared for the when — not if — of being the person who’s in quarantine. For me, that means lots of time typing on my computer so I can rest just a little easier knowing I’ve done everything I could to make my replacement and my crew’s life as easy as possible.

Production Audio


Before Mean Girls was planning to hit the road again, I got the opportunity to work on the re-start of the Cats tour as the production audio. That was a job I had never considered myself remotely capable of pre-pandemic, but as the world started to open back up, I was itching for a chance to get back into a theatre and more than ready for what I now viewed as a challenge instead of an impossibility.

I’m sure more than a few people reading this have never heard of production audio before. It’s not a job that’s billed on the front of the playbill like the designer, and they’re only with the show to get it up and running, so you’re not going to see them in the theatre when you go to watch a show. So what do they actually do?


So. Very. Much. They’re responsible for the logistics of taking a show from theory to reality. Given paperwork from the designer, they interface with production, design, and the shop to get all the equipment needed and figure out how everything goes together. How will all the gear fit into racks? What cables do you need to connect everything? Do you need infrastructure for MIDI or timecode? Networked computers so you can operate amps, consoles, or programs remotely? Who in the crew will need com and/or video and how does it get to them? Which speakers will need rigging hardware and do you know where they’re going to go or should you bring multiple options?

It’s a parade of endless questions

Which requires an extremely organized person, a good communicator, and a lot of technical knowledge. My pre-COVID hesitation had always been the last part. I knew I was organized and could keep people in the loop, but I know the tech-heavy aspects of sound don’t hold my interest nearly as much as the more artistic side of things, and I’d always assumed that meant I would be a disaster in such a job.

Thankfully, with the tour re-mounting instead of being a brand new production, the system was already built and sitting in a warehouse. That removed the most complicated technical part of the job from my plate, plus I’d worked with the original designer and production team before, so I was familiar with how they built their shows. That was actually why I got the call for the job: I may never have done production before, but I knew how to tour and what I’d be working with.

With that part already taken care of, my job was mostly coordination and improving efficiency. On a new show, the crew has two or three weeks in the shop to get all the gear, rack it up, cable, and test everything. For the remount, we took the existing system back to the shop and we had two weeks to make the changes the designer and production manager had agreed on so the show could load in and out faster. (It was going to a schedule with shorter stops and more frequent moves.) I had a list of items that were getting cut (under-balcony speakers, remote com stations, etc) and substitutions that were being made (drums mics swapping out for an e-kit, the console changing over from an SD7 to an SD10), as well as evaluating anything we could tweak to make the touring crew’s life easier.

The shop crew consisted of me as the production audio, the A1, A2, and a few locals who are audio people that work on or around Broadway. I was in charge of hiring the local crew which was something completely new to me, but I was fortunate to have friends in the NYC area who were veterans of plenty of shop builds and were both available to work and willing to help me navigate a job I had never done before. Pro tip: hire people smarter than you and listen to them. A large portion of the success of the show can be directly attributed to my shop crew. They helped me work through technical questions, pointed out when I’d missed things or might have incorrect information, and offered advice when I needed help or they knew a better solution. With their help, I didn’t have to know all the technical answers and could lean on their expertise.

At the end of the two weeks, we packed everything on a truck, and the A1, A2, and I went to tech. Now I was back in familiar territory, just in a different role. Instead of loading in the show in my usual role as the A1, my job as production was to take care of setting up anything that the road crew shouldn’t have to touch on a normal load in or out: cameras that live in electrics truss, speakers that are mounted to set pieces, setting up for an orchestra rehearsal that would only happen in tech, etc. My goal was to always be one step ahead of everyone else, whether that was having tech tables set up before designers came in, making sure speakers had the correct hardware and were ready for the crew to set up, or ordering supplies to make sure we had everything we’d need.

I liked this part of the production process the best. After almost a decade on tour, I’d tried many ways to streamline shows and I knew what worked, what didn’t, and what could make a project less of a pain. So I rigged up speakers, spiked placement, color-coded cables, and did my level best to make the system as easy as possible to move.

All in all, I consider my first go at production a success. Did I do everything perfectly? Nope, definitely not. But the fact that I was willing to ask for help and advice meant that most of the problems I encountered were minor or the crew knew it was an honest mistake and were willing to give me some grace while I fixed it. Am I going to change my career trajectory now that I know I wouldn’t be an abject failure at production? Again, no. It was empowering to try something new and I truly enjoyed the work, but in the shop I still found myself wishing every once in a while that I was the one building the racks instead of answering endless emails and phone calls, printing labels, and fielding questions. In tech, I occasionally itched to push faders instead of sitting at my tech table placing yet another online order and looking over what seemed like endless lists of projects to do and fixes to make. On the other hand, I wouldn’t automatically turn down the opportunity as I had in the past. It was gratifying to see my to-do list slowly dwindle down as we went through tech and I loved the feeling of accomplishment when I knew I’d made some part of the tour just a little bit easier to load in. Since it was the A2’s first tour, I was also able to give him advice of pitfalls he should avoid and the best ways I’d found to speed up my workflow. Touring is a very odd combination of skills, and it was good to know I could pass on my accumulated knowledge to make someone else’s life easier.

This past 18 months of pandemic gave me a good opportunity to reevaluate my skills and realize that, not only was I capable of more than I thought, but I had a wonderful community around me who wanted to see me succeed and was willing to help make that happen. So, maybe, as the entertainment world comes back to life, try something new. You might find yourself pleasantly surprised!

Not a Solo Project

Whether you work in theatre, concerts, studio, or podcasting, it’s unlikely that you are a team of one.  All of these disciplines tend to be very collaborative, and often our teammates are scattered around the city, state, country, or even the world, making thorough communication extremely important.  Sometimes an email chain or group text just doesn’t cut it, so when you need to beef up your communication style, consider one of these communication platforms (in no particular order).

Slack

Ok, I said no particular order, but this one is my favorite.  Maybe it’s because this is the one I use the most.  The user interface is great, and it can be used via web, mobile, or PC.  It integrates well with other apps like Google Calendar, Drive, and Zoom, making productivity an all-time high!  File sharing and adding attachments is straightforward and easy, and the notification system allows for deciding which kind of notifications you would like to receive, or receive none at all during Do Not Disturb mode.  You can assign different channels or threads, so everyone doesn’t have to be involved in every conversation if that is not the end goal.  You can also @ mention specific people if you need to specifically draw someone’s attention to a particular subject.  The search function is quite robust and handy, and best of all (cause I’m a sucker for emojis) customizable reactions make this team app super fun!! Two enthusiastic thumbs up from me!

Teams

If you are a heavy Office 365 user, you might love this additional integration into Microsoft land.  Teams is all about productivity and increased focus on work, and the very professional/business look of the interface really supports this idea.  If you’re into a little more of a fun chat environment, you can still add reactions, gifs, and emojis at will. This software is pretty user-friendly and is entirely cloud-based, so your teammates can access info anywhere.  Teams have channels like Slack but also integrate Tabs within the channels as another layer of organization.  The default tabs are Posts (storage of every chat within a channel), Files (storage of shared docs within the channel), and Wiki (a smart text editor for editing, drafting, and chatting).  You can also add and customize additional tabs.  Teams also features outside app integration like Dropbox and Google Drive and also allows for video and audio calls without leaving a chat.  It’s been reported that there are maybe too many similar tools, but maybe that’s better than not having enough?

Google Hangout Chats

I know there are many Google tool users, so if that’s you, this is your platform!  Of course, the most attractive part of this is the total integration with all of the Google apps like Gmail and Google Drive, but I must let you know that it’s not so easy to integrate with Office 365, so if that’s important to you, maybe stick with Teams.  This platform requires no installation and it’s free, so setup is a breeze.    Messaging in Google Hangout Chats is easy and efficient, and you can add a layer of organization to your chats by using Rooms.  Screensharing and file sharing are available, although file-sharing can be a little clunky.  Like most of the other apps, audio and video calls, as well as instant messaging, are available.  Video resolution could be better, but hey, it’s free. This is a pretty basic app, but free and easy to use are really top features, especially if you’re just getting into collaboration platforms for the first time.

If these communication platforms don’t live up to your expectations, I implore you to jump down the internet rabbit hole where many, MANY more options exist, but my advice is to give these three a shot first so that you know what you do and do not need in your everyday team communication.


 Tips for Tech

My last blog covered tips for touring, but before you truly hit the road, you have to get through tech. Which is hectic and stressful as you try to combine speakers, lights, sets, and props into an actual show.

The tech period is a progression of the show that slowly adds elements into the mix

First is load in with just the crew. Everything comes in from the various shops (lighting, sound, scenic) and you put it all together physically for the first time. Once things are mostly set up, lighting gets a day or two to focus (the rest of the crew will work on projects offstage or at FOH) and sound gets quiet time to tune the system, usually without any other crew in the building (love them dearly, but let’s face it, carps are always better at being unseen than unheard). Next is dry tech where the SM and the crew run through lighting transitions, scene changes, and automation moves without the actors, working through timing and how the SM will call the show. Then the actors leave the rehearsal studio to join the crew at the venue for cast onstage, teching the show with all elements except hair, wardrobe, and the orchestra. After a few days of that, the musicians get settled in the pit and are added to rehearsal for the last few days. Finally, you have the final dress rehearsals with all elements, including hair and wardrobe before you officially open!

It’s a grueling schedule with a lot that has to happen in a short amount of time. I’ve had some tech periods where I worked almost every day from 8 am to midnight for a month straight without a day off. I’ve done others where we had a practically luxurious 8-5 schedule with the rare treat of getting to see the sunset for a week or so before the actors got to the theatre.

Somehow, everything eventually comes together, but opening night seems like it’s very far away when you stand on an empty stage and hear the roll doors of the loading dock clatter open. Even then, opening night is a milestone, not the endgame. Your goal throughout all of load in and tech is to learn the show, learn the system, and get it ready to take on the road.


Assume that you won’t remember anything, so document everything

This is the one time where it’s okay to be glued to your phone as you take pictures of how speaker carts or cases pack, how cases line up in the truck, or mic placement in the pit (especially things like drums and percussion that can easily have twenty to thirty mics to set up).

When I take reference photos, I’ll try to get close-ups on things like speaker rigging and mic placements, but also have wider shots where you can see the entire drum kit, the full stage, or where the cluster truss hangs in the space, etc. Details are always good, but having photos of the big picture help establish context. I only take reference photos in tech for specific items, but I’ll take archive photos in every venue I go to: of the layout of the audience, my FOH set up, how I installed the system, where racks lived backstage, etc. When I go back to a theatre on a different tour, I have the photos from the last time I was there as a reference to jog my memory when I’m figuring out my plan for load-in.


Keep in mind that tech is the most time you have to spend with the design team

Once the tour’s out, someone from design might stop by for a day or two in a major market (LA, Chicago, DC, etc) or, if the show plans to run for several years, there may be plans to make regular checkups (say every 6 or 9 months), but that’s about it. So make sure to take advantage of the opportunity to get to know your designer. If you’re like me, making a point to spend time with someone for professional reasons feels disingenuous and presumptuous, something akin to greasy schmoozing rather than sincere conversation. It helps me to frame it as a genuine effort to build a relationship rather than a mercenary pursuit of future jobs. Plus, your designers also want to get to know you, not only to see if you’re someone who can take care of this show now, but if you’re someone they might want to work with in the future. I ended up moving from Les Mis to Saigon because I was a known entity to the design team. They felt more comfortable having me pass Les Mis, a show that was already up and running, off to another A1 and move over to Saigon so they didn’t have to gamble with bringing on someone unknown to start a show.

How you interact with your crew during tech will set up the tone for the rest of the tour

Especially with your A2. The A2 is backstage during tech while the rest of the sound team is at FOH, so make a point to include them when you can, usually during meal breaks and post-tech at the bar. This is something that might seem obvious, but that’s not always the case, which I, unfortunately, found out when I spent one tech as an A2 being routinely forgotten by the associate designer and production audio. That show was seven years ago, but the fact that I was made to feel inconsequential by design and unsupported by my A1 left a lasting impression. Now, if I have the opportunity to socialize with design, I try to make a point to invite my A2 or make sure they know where we’ll be for a meal break. That means the A2 has the opportunity for face time with the design team and hopefully conveys that I, as the A1, respect and appreciate their work and view us as part of a team.

Another overlooked aspect of tech is music

Usually, you have a keyboard in the house while the actors are on stage, then the full orchestra joins for the last couple days. However, several days before that, they’re somewhere in the theatre rehearsing (the lobby, a rehearsal room, etc). Whenever you have a moment, go and just listen: it’s one of the few times you have to hear what they sound like on their own. For the rest of the tour, you’re focusing on how they sound through the system or how they’re blending with the cast in the mix, or how inconveniently loud they are in the lobby during load-in while you’re trying to time the room. I’ll try to peek in for a moment during cast breaks onstage, even if it’s just listening to the MD give notes and work through a passage. Few people know the music better than the MD, and hearing how they explain things to the other musicians can give you a better understanding and appreciation of the music.

Finally, a few practical tips

Tech is stressful and tiring, but it can also be fun. You’re meeting new people, taking on new challenges, and getting to mix a new show for the very first time. Enjoy the thrill and get some sleep when you can!

Five Reasons to Join TSDCA

A bunch of us SoundGirls bloggers who work in theatre are also members of the TSDCA, which stands for Theatrical Sound Designers and Composers Association. I’ve personally been involved in TSDCA since around 2017 and became a more active member once I began freelancing in NYC. During the pandemic, the friends I had made through TSDCA provided a great source of Zoom camaraderie and company, and through TSDCA, I’ve gotten to work with them on some really exciting projects that help to further awareness and advocacy for those working in theatrical sound. So for this month’s blog, let’s dive into what the TSDCA is, what it does, and why you should join!

Let’s start with the basics: What is TSDCA? From the mission statement: “The Theatrical Sound Designers and Composers Association (TSDCA) is a professional membership organization of sound designers and composers for the performing arts working in the United States. Through advocacy, ongoing education, mentorship, and outreach, we seek to advance our community and promote sound design and composition as vital artistic components of the collaborative art of live theatre.”

The TSDCA began in part as a reaction to the news in 2014 that the Tony Awards for best sound design of a play and best sound design of a musical were being eliminated. One of the reasons that the Tony Awards committee cited for the elimination of the awards was that many Tony voters were abstaining from voting in these categories because they didn’t feel they understood the role of sound design in production enough to judge it objectively. Another was that many of them considered sound design to be more of a technical trade than an artistic contribution, and therefore less worthy of the same creative recognition that is awarded to scenic, costume, and lighting designers (side note: there is still no Tony Award for video/projection design). These two discoveries made it clear that we, the theatrical sound community, were going to have to do some major educating and advocating if we wanted to be seen as equal peers to our visual designer counterparts and earn back the recognition of that equality through having a Tony Award category that recognized our work. And so the TSDCA was born!


One of many petitions that circulated back in 2014 to support reinstating the Tony Awards for sound design.


TSDCA’s current membership consists of folks from all around the country (including some from around the world) who work in many different facets of theatrical sound design, not just those who consider themselves sound designers. For example, I joined TSDCA as an Affiliated member because as a theatrical mixer, I feel the work I do is closely aligned with that of my design colleagues, and that it’s important for me to join with them to help better the industry we all work in. Affiliate membership is for those who work in conjunction with sound designers, such as mixers, sound supervisors, and production audio heads. Think of it as the “friend of the family” membership tier 🙂 In addition to Affiliated members, there are Professional members (those working as sound designers professionally), Early Career Members (out of school/training and in one’s first 3 years of professional sound design work), Emeritus members (folks retired from the field), and Supporting members (those who want to be involved but aren’t yet working in theatrical sound, such as students).

TSDCA is an all-volunteer organization, i.e. no member is paid to do anything administrative, such as serving on the board or chairing a committee. Membership fees are affordable and scaled by membership tier in order to be equitable. Plus, financial assistance paying dues is always available to those for whom it presents a barrier. We want you to be able to participate without breaking your bank!

And SoundGirls Members receive a 50% discount on membership using the code Soundgirls

So, what are some of the perks of being a TSDCA member? Here’s my personal Top 5.

NETWORKING

It’s been said before, and I will say it again: this business is 99% about who you know, and who knows you. If you’re an aspiring designer, mixer, production audio, or anything else related to theatre sound, joining TSDCA is a fabulous way to meet people and learn about possible work opportunities! True story: I can trace every single job I got in my first year freelancing in NYC to connections I made through TSDCA. It really does work like that!

On the formal networking side, TSDCA has lots of resources as well. All TSDCA members are listed in the member directory, which is available to the public. You can add as much or as little detail as you want to your public profile, such as contact info, where you are based, what you do in sound, and more. Whenever someone asks TSDCA co-chair Lindsay Jones for a hiring recommendation, he sends them straight to the member directory, so you DEFINITELY want to be on there! There is also a job board that is available to members only, and lots of great opportunities get posted there every week.

EDUCATIONAL OPPORTUNITIES

TSDCA hosts various learning events all year round, both in-person and in the past year, virtually. We have an annual meeting in early summer that is packed with sessions on everything from working in content creation software like Krotos, to learning how to read through the fine print of a contract. These webinars are frequently available to the public (particularly the ones during our annual meeting) but some of them are members only. And if you can’t make it to a live session, almost all the videos are later posted on the TSDCA website. TSDCA members also often get discounts on software, sample libraries, and training courses from our corporate sponsors, which include great brands that you’ve definitely heard of like Meyer Sound, Rational Acoustics, and Shure, to name a few.

Additionally, early in the pandemic, some TSDCA members started the Facebook group “Student Sound Designer Connection,” where folks in school/training (or of school-age) can connect with each other and professionals. This allowed a lot of folks who were learning from home in 2020 to not stagnate their education and made even more resources available to learners who might not have a lot of opportunities to learn about sound design or take sound design courses at their school/program. The group is open (pending moderator approval) to anyone who is a sound student (you do not have to be formally enrolled in a sound design or even theatre major) or wants to support sound students.


You can join Student Sound Designer Connection without being a member of TSDCA!


CREATIVE OUTLETS OUTSIDE OF WORK.

Especially during the pandemic, TSDCA put together chances for a lot of us to stretch our creative muscles, which was really important during the work drought of 2020. During our first virtual annual meeting last June, we hosted a creative challenge where interested members worked solo or in teams to put together an aural response to imagery picked out by the steering committee. This led to possibly more intra-TSDCA collaboration than any of us had ever done before, since it meant folks on opposite coasts, or in different stages of their careers could work together on something stimulating and fun! For my part, I took it as an excuse to get back into playing my long-neglected trumpet and recorded for two original compositions that came about as part of this creative challenge. Since then, we have also hosted a creative challenge for the Student Sound Designer Connection group, plus we reprised it as part of the 2021 Annual Meeting, which was also virtual.

Even outside of these one-week projects, there are plenty of chances to participate artistically in TSDCA. Member Michael Roth hosted a series of composer salons over the course of the last 18 months on Zoom, which led to members getting to bring in pieces they were working on to be assessed by the group or to talk to professional composers whom Michael was able to secure as special Zoom guests. For those who are not as interested in composing, you can work on the TSDCA podcast, which is an in-house operation spearheaded by member Josh Samuels. If you’re into graphic design or writing, you can help out with the website or newsletter. Like creating video content? You can submit ideas for Instagram posts, or do a one-day member takeover of the page (fun fact, the Instagram is managed by none other than yours truly! Give us a follow at @tsdca_official).

Here’s a screen-grab from a composer salon where we put on a virtual performance of “In C” by Terry Riley! You can watch the whole thing here: https://youtu.be/vw0sIONmsBo . And yes, while I’m not visible in the video, that is indeed me on trumpet ☺


MAKE THE INDUSTRY BETTER

TSDCA was founded because we, the sound design community, discovered there was a need to advocate more strongly for ourselves. That mission remains core to what we do, and lots of great projects have been born from our desire to show the world what theatrical sound designers do and why it matters. Some highlights of past and current advocacy projects include:

The 2019 winners of the Pat MacKay scholarship. Look out for the 2022 application to go live next spring!

IT’S JUST A GREAT HANG!

Did I mention yet that we’re also just a super fun group of people? I’ve made many close friends through the weekly TSDCA zoom hangouts, some of whom I have never met in real life due to not living/working in the same regions. We have holiday parties, informal gatherings, a chess club, and sometimes even game nights. It can be hard to maintain social connections in this industry, with the crazy hours and non-standard schedules. And of course, it’s good to have friends outside of your work community as well. But speaking for myself, the fact that I could hop on zoom once a week and escape my apartment to be with friends (if only metaphorically) and talk about the industry we all missed dearly made a big difference in helping me get through the first phase of the pandemic. We’re always chatting on our members-only Facebook and Slack groups, and we love when newly minted members join us for events that are not about learning, but just plain FUN.

If I’ve made my case well, and you have decided that joining TSDCA is right for you, head on over to TSDCA.org to learn more or apply! And use the code “Soundgirls” to receive 50% of your initial membership fee.

Mixing a New Musical


Getting any show up and running is hard. Layers upon layers of new information are being added to the piece once the actors move from the rehearsal space to the performance venue, and it’s all happening very quickly. As a show’s A1, I am hard at work preparing my script, generating paperwork, programming the console, and in some cases also working as a hand on the shop build and/or load-in. Design elements are coming together throughout the tech process. Ideas are tried, then retooled, and tried again. However, one thing that usually isn’t changing is the actual script of the show. Not so on new work!

New pieces, and especially new musicals, come with their own set of unique challenges. Sometimes members of the writing team are present throughout the rehearsal process, making rewrites and changes to the piece as it gets staged. Rehearsal reports sent out by the stage manager will include new script pages and/or change logs, all of which can make it harder to get familiar with a show in advance of tech and previews. Songs may be moved around in the script, new scenes or characters might be added, entire sections may get cut. The entire product is constantly evolving!

Personally, new musicals are my favorite kind of shows to work on, despite all these added challenges. In fact, part of why I love them so much is precisely because of these added challenges! It’s really special to be part of a work that is being shown in its full form for the first time, and it really does keep me extra engaged when I’m in the tech and preview process. The audience has no preconceived notions of what the show is going to look or sound like, and as the mixer, my role in facilitating the storytelling is even more crucial, because no one has ever heard it before!

So, how should one approach the preparation process when mixing a new musical? In general, the process is the same as with existing work, just with a few added hurdles.

Do your homework as per usual

Familiarize yourself with the material in advance as best you can, whether it’s through demo recordings or by watching run-throughs in the rehearsal hall. The new musical I am currently mixing was meant to be produced in 2020, but due to the pandemic, it was adapted into a radio play and released on audible, with the fully staged production postponed to this summer. So, since a new musical likely won’t have a cast album yet, I was able to use that audible recording to do my “homework” of getting to know the general feel of the scenes and songs, even though I knew that the show would likely change a lot in the year that passed between when the radio play was recorded and this summer when we would finally get to do the show for an audience.

Prepare for new pages

This is probably the most labor-intensive part of the prep process on a new musical. As the script changes, whoever is tracking those changes (usually someone from the writing team or stage management) will bring you new replacement pages to insert into your book, or a change sheet with lines that you should write in on your own (some shows do one or the other, on my current show, Row, they do both). This means you’ll be doing quite a bit of transferring your notes from old pages to new ones. For that reason, it’s all the more important to develop a shorthand for yourself that you like, so that you can do all this rewriting as quickly as possible. For example, I will abbreviate my Band Master fader as “B” and my Vocal reverb fader as “V”, then I use musical crescendo/decrescendo markings for my dynamic moves. Writing “B < -5” is a lot faster than having to transfer the full words over and over again every time a new page comes in! Other little symbols I like to use are up and down arrows for pickups, slashes for when characters’ lines overlap, and my favorite, a little glasses symbol for when you should look at something specific for a cue (this is a common practice among musicians to remind themselves when they should watch the conductor).

Don’t get rid of your old pages!

As Gibbs’ Rule #11 teaches us, “Everything is subject to un-change.” A new scene might not work, and you might go back to the old scene. Keep all your change logs and cut pages handy in case you need to re-insert them or reference them for any reason. Fun fact: I once did a new musical whereby the end of the run, my stack of cut pages was basically the size of the finished script!

My current stack of old pages for Row.


Practice but don’t memorize yet

As you mix a show more and more times, you will naturally begin to develop muscle memory for making your pickups and fader moves. However, on new work, it’s important to not let habits set in too soon in case things keep changing. I have on occasion caught myself making errors because my hands got too used to doing a scene a certain way and then the scene was re-written. Pay extra attention to any lines that you use as cues for yourself in case they change!

Consult all your sources

Since we’re talking specifically about musicals, it is likely that songs will change in addition to book scenes as the show develops. Make sure that you are getting updates from the music department in addition to the ones you get from writing/stage management. Sometimes the piano/vocal will have more current information than the libretto! Also, even if you don’t read music, it can be super helpful to have access to the piano/vocal score to consult as you figure out the timings of band moves and console scenes.

Try to program flexibly

As a general rule, it’s good to leave yourself “buffer” console scenes/snapshots as you program in case you decide you need to add things or adjust DCA assignments. This is even more true on a new musical. For example, the console on Row is a Yamaha CL5, which can accommodate up to 300 console scenes. When I laid out my DCA tracking prior to programming the show, it looked like I would need about 60 scenes to do the whole show. So rather than start at Scene #1 and go sequentially, the first song is scene #10, the second song is scene #15, etc. That way I have room to add more scenes internally without having to renumber every subsequent scene. To save time and hassle, also try to program in a more minimalist way than you might on an existing show so that you can adapt to changes more easily. Inevitably you will find yourself having to go through 10 separate console scenes to make a single change to all of them because of a script/song change, but the fewer times you have to do this the better. ☺

My console scene tracking sheet for Row. Notice the skips between numbers!


The thing to remember most of all on a new musical is that while rolling with the punches as things change can be stressful, it’s all in service of the art. I once worked with a choreographer who when he needed to adjust something would say on his god mic “I’m making a change” and the whole company would reply “Change is GOOD!” I’ve made that quote my new musical motto. The reward of knowing that all of the work that the creatives are putting in (and you alongside them) is truly helping to tell the story better will make it worth it when the show finally gets “frozen” (this means no more changes are allowed) and makes its world premiere in front of its first-ever audience!

Sound System Design for Immersive Spaces

I have always been excited by sound design and its potential for storytelling as well as the evolving technology of the industry. At the start of my career, I was mainly a theatrical sound designer and engineer. Then I got a gig designing sound for Halloween Horror Nights at Universal Studios. I had never considered theme park attractions! Since then, I have kept getting sound design work for immersive theater and themed events. There are many types of live, immersive storytelling events out there: immersive theater, theme parks, art exhibits, and experiential marketing pop-ups.

When sound designers work on live immersive projects, they must have an understanding of the story as much as how to implement the technology. The appreciation of the story helps the sound designer make decisions about the creative and system design that will not break the audience’s suspension of disbelief. It can be harder to pull off the suspension of disbelief in immersive settings than in more traditional venues, but the payoff is extremely rewarding!

I want to discuss sound reinforcement of mic’d performers and instruments in this article, but it is already very long. The science there does not really change, though perhaps it gets more complicated! So in the interest of length, I will cover very general speaker placement, creative choices, and the collaboration process.

Sound Systems for Traditional Venues vs. Immersive Spaces

Let us begin by discussing the fundamentals of sound systems for proscenium spaces as well as immersive spaces, and the differences between them. Understanding the components of sound systems for more traditional venues informs much of the decision-making behind building immersive sound systems.

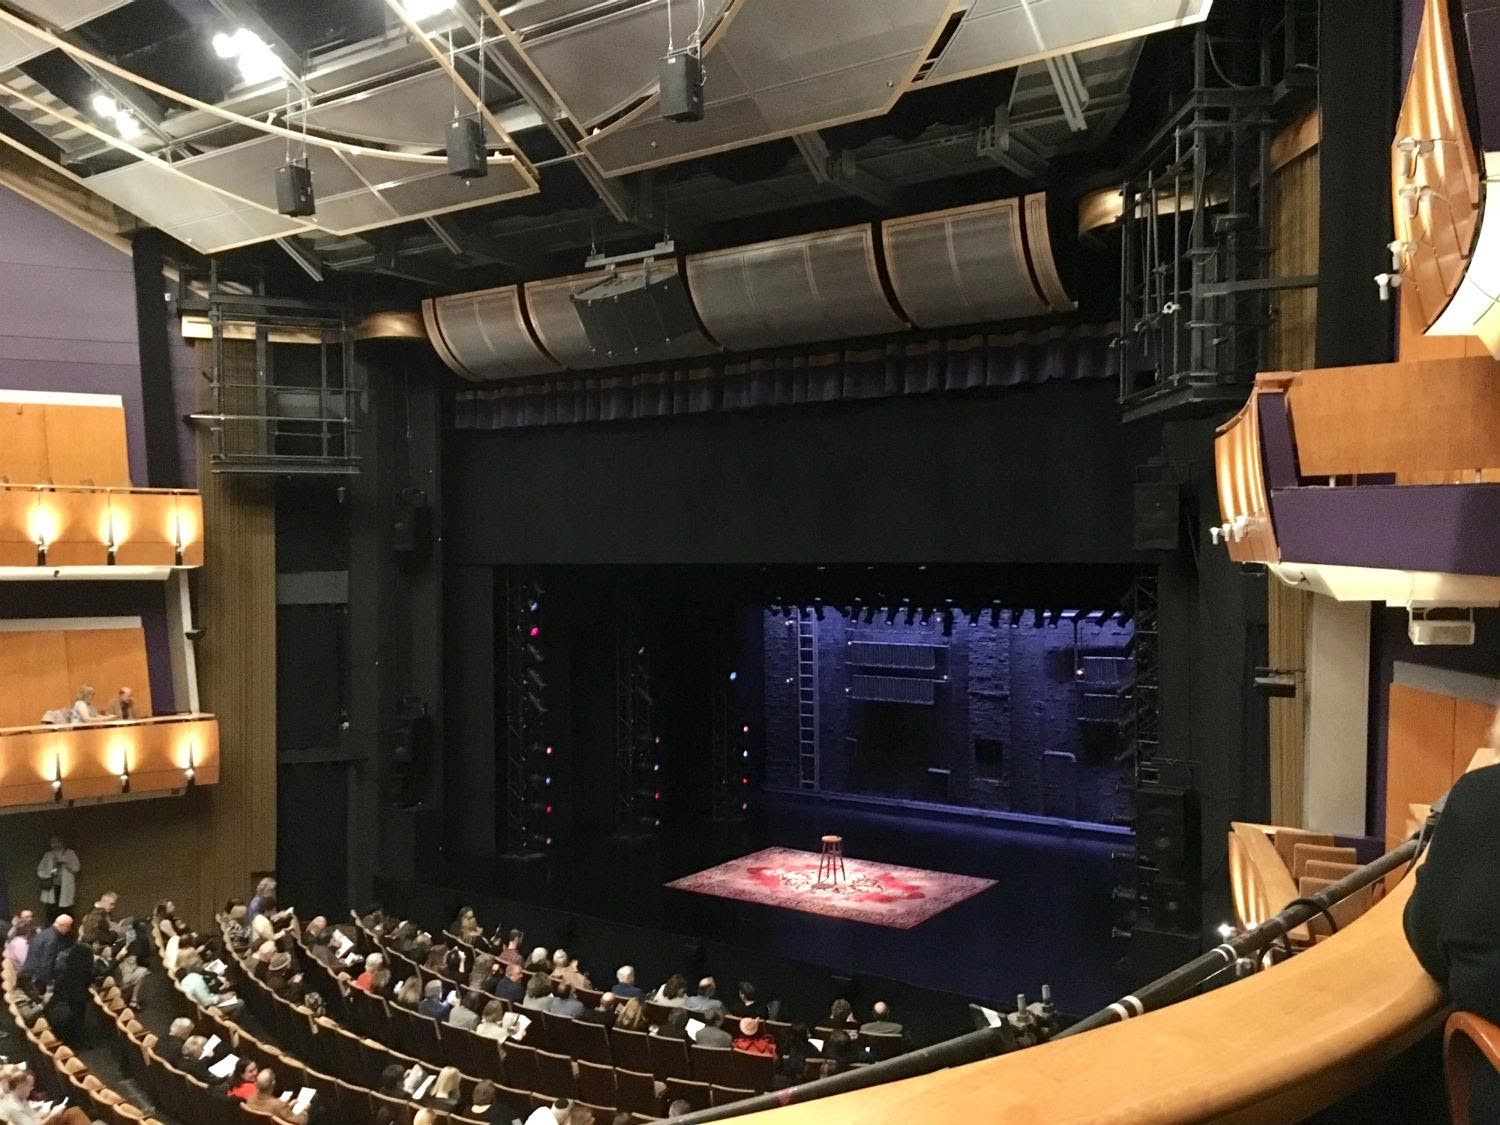
Proscenium stages have three output channels as the core of their systems: left, right, and center. Focused and tuned correctly, those three speakers (or speaker arrays) deliver a sound image where the audience perceives sound as coming from the stage, rather than any one speaker. The optimal place to sit to get the best sound image and mix is referred to as the “sweet spot.” Three channels make for good sound coverage of an audience, where most people are sitting in that sweet spot. It also provides more bussing opportunities for a good, intelligible mix. Music is sent to the left and right channels, with vocals in the center channel, so they do not compete as much with music. Then you add subwoofers delivering the low frequencies, making for a full mix.

If you look closely, you can see the center cluster, and then speakers on the left and right sides of the stage. Photographer Mike Hume. (Source: Ahmanson Theatre: https://losangelestheatres.blogspot.com.)

Larger venues with proscenium stages generally also have surround and delay speakers so that sound can reach seats out of the sweet spot (and let’s be honest, they are also for cool panning effects). And then there is usually some type of monitoring on stage for the performers, separate from the sound system for the audience. Two other characteristics of traditional venues: the audience is seated in one place the whole time, and the room is typically designed and acoustically treated for live performance.

Similar to traditional stages, if the immersive sound designer has the budget they can and should buss music, sound effects, and ambience to different speakers for an optimal mix if they have the budget. Truthfully, because of where they end up placing speakers and budget restrictions, they may have no choice but to put multiple sound elements through the same output.

Differently from proscenium stages, immersive events are typically installed in found spaces, and the performance happens on the same plane as the audience. Actors usually mingle and talk to audience members. This could mean that speakers for the audience are also used as actor monitors, which can present acoustical problems if your performer is wearing a microphone. Even with experiences where the audio is all pre-recorded and played back, there are acoustical challenges in immersive spaces since they are not initially designed for live performance. However, you can use acoustics to your advantage and have a lot of fun!

The sound designer’s job is to trick the audience into believing that they are in the same world as the actors. Immersive experiences are even less forgiving of seeing speakers because the sound is supposed to feel as if it is generated within the world and not through a sound system. This challenge sounds like a real bummer, but I implore you to embrace it. So how do we do that?

Collaborate Early and Often

Before we can talk about system design for immersive spaces, we need to talk about what kind of information you need before you can make those decisions. Immersive events are highly collaborative, and it is important to make sure everyone is on the same page.

First, you will receive a client deck or presentation. All the vendors (sound, video, lighting, costumes, set, props, special effects…) will have a meeting with the client or director to get a rundown of their vision. Everyone should receive a paper version of the client deck. In a theatrical setting, this meeting is called a kickoff, first production meeting, or designer meeting. Whatever paperwork you receive during that meeting, consider it your show bible and keep it handy. It may even answer the next few questions covered here.

Next, schedule a site visit. Inquire about power capabilities, since that will determine most of your sound system. Ask about where power is being drawn from. Many immersive productions rent a generator. Some buildings might have the means to use in-house power. If that’s the case, ask how many circuits they have. You might not be able to have quite as many speakers as you would like, and you need to determine your compromises early on so you can let your director know about limitations in the event that the production does not have the budget or facility requirements to support something they have asked for. Find who is in charge of power (usually the best boy or master electrician) and have a discussion about having separate circuits from lighting, and where you need to plugin as soon as possible. You will be dealing with enough unique issues without having to troubleshoot a ground hum.

Venues made for performance have the infrastructure for running cables and hanging speakers; site-specific performance spaces do not. Begin to ask questions about how you can hang speakers at the site visit, as well as cable runs. Ask if you can drill into walls, and what they are made of. Can you hang rigging points from the ceiling? Talk with the lighting, show set, props, and technical direction departments about their plans for running cable so you do not run under theirs. Inquire about whether anything will need to be struck between shows. These are all considerations that will influence your system design. Expect to have these conversations throughout the design phase as every department moves closer to install.

Ask your production manager, director, or set designer about backstage areas (and the traffic going through them) right away. Once you spec your console, show computer and other rack equipment, send your production team exact measurements and rack elevations with power, front and rear access space, and air conditioning/airflow requirements. Real estate is often tight in backstage areas, and your “front of house” area might need to be shared with lighting, video, and even actors in standby for a scene. Put rack and equipment dimensions on your sound plot and perhaps even map out cable runs so everyone on the team has an idea of available real estate in these backstage spaces.

Make note of acoustics, and ask about audience pathways. Where the audience travels will affect where you put your speakers and how you run your cables. Also, ask about audience capacity and flow. If one audience group enters an experience while a previous group is in another room further ahead, you will need to know that to consider sound bleed, which could affect creative choices.

This article iterates on this point throughout, but I’ll say it again: it is in your best interest to collaborate early and often with the art department. Reach out to the set designer and ask for ground plans and elevations at this stage so that you can draw up a speaker plot, and begin to have conversations about hiding speakers.

Finally, ask about emergency procedures. Traditional venues have obvious exits and a voice of god mic. Immersive events might need to utilize actors to guide the audience out of an experience, and the team should talk about whether they cut sound entirely when an emergency happens. (Generally speaking, they should.) Does someone get on a  mic and make a live announcement or is there a pre-recorded cue? Any number of emergencies could happen, whether it is a technical failure, the weather, or a situation where the audience and/or cast are at risk. Cover all of the possibilities. Your director should decide at what point an emergency is serious enough to trigger a show stop, and what the procedure for a show stop is, and how the show is resumed. The team should determine all of this together, and you need to know what the emergency procedures are as the sound designer so you can program a show stop cue. The emergency system should be provided by another vendor because you as the sound designer are probably not current in things like local fire safety and emergency services. You may provide an emergency paging system separate from the show system if you are asked, but have a conversation with your producers about how that is outside of the scope of sound design and that you will need a separate budget.

The Speaker Plot – Ambience

Speakers for an immersive system can have any of five purposes: ambience, music, spot effects, voiceover, or live reinforcement. You can separate out what goes where, but you often end up sending multiple elements through shared outputs. This is because there are many constraints in designing a plot — budget, scenic design, placement of lighting instruments, and of course how the sound waves from speakers will interact with space and other speakers.

Speakers for ambience, music, narrative voiceovers, and emergency announcements work best above the audience. The distance makes for good coverage because they are in the widest part of the speaker’s throw. Additionally, placing speakers low means sending your acoustical energy into the legs of your audience, which means losing a lot of energy needlessly since sound is not aimed at their ears! If your speakers are going to still be visible to the audience even if they are above them, put them behind the audience path. This does not work for every application — if you have a staged area with mic’d performers, this is not the solution because the sound image has to be where the performers are staged — but it works much of the time.

I prefer to use a lot of little speakers with sound pushing through them at a quieter volume. (I really like the Meyer MM-4XPss.) This makes for more consistent coverage and a believable environment. However, the budget does not always allow for a ton of tiny speakers. In this case, you can compromise with one or two big speakers. Always prioritize coverage — it can really take an audience out of the world if they walk through a dead spot. Place and focus larger speakers in such a way that they cover the whole room, and send music, ambience, and voiceover through it. Of course, mix all those elements in such a way that they are balanced and you don’t blow the speaker!

Subwoofer placement is definitely challenging because they are often too big to hide! If you can place a subwoofer outside of a room against the exterior wall, it should do the trick. I have also hidden them behind set pieces. More about subwoofers later.

A note about having music in stereo, because I have run into it with some artists. Yes, having a stereo image for the music is really important. If you can get away with having two speakers in a room for a left and right channel of music — do that.  It also depends greatly on audience path, room size, and budget, and physics. A stereo mix requires that the left and right channels arrive to the listener at the same time. To accomplish that, the left and right speakers need to be equidistant from each other and the listener needs to stand in the sweet spot between them. In an immersive setting where the audience is moving, it might not be possible to place speakers in such a way that a good stereo image is delivered. In most immersive settings instead of stereo or 5.1 Surround Sound (which are valid in situations where your audience is static), you will often have a massive distributed audio system. This means that more often than not mono audio files are preferred so that you can place them exactly where you want them without worrying about how they are tied to something else. Essentially, imagine not building a 5.1 system, but a 32.10 system or larger. Again, have stereo speaker pairs if you can swing it, but be aware that this is another potential compromise. Know the science so you can explain your decisions.

If you are working with a composer, talk to them about giving you stems so you can put individual parts of the music wherever you both want. It is incredibly useful and efficient to mix the music as needed in the room, to hear how it reacts acoustically.

The Speaker Plot – Point Sources

Another consideration is, what are some specific sound sources in a room?  Things like telephone rings, radios, et cetera differ from ambience and music speakers in that they require the audience to perceive that sound is coming from the source. (There are other technical hacks you can do to make a phone ring on cue, but this article talks specifically about speaker placement.)

When choosing a speaker for a point source, consider what is going to play through it and where you are going to hide it. Is it a phone ring, and that’s it? Then it doesn’t have to be big. Or is the effect a loud car horn that requires a bigger transducer to push adequate volume? Also, have a conversation with the set designer about what props and set pieces are around the sound source. The ability to hide a speaker, and how and where it gets mounted, will influence what speaker you choose as well. Another fun note about point source speakers: As you attend tech rehearsals you might realize that one point source speaker does not have the volume or throw necessary for the whole audience to hear it clearly once you get bodies in the room. In these cases, you can use the ambient speakers as fills. Dial in a little bit of the sound effect to fill the room, but just enough so the main source is the point source.

One of the most challenging and rewarding things about system design for immersive spaces is hiding speakers so the audience does not see them. Send a plot to your set designer early and expect to change it several times. Include a key with speaker dimensions. Talk to the set designer and technical director about how you are going to mount speakers and get their input on the best materials to use to do so. If a point source speaker has to be behind something, talk about potentially using an acoustically transparent material. (Yes, I have had to explain that velour curtains will muffle high frequencies. It happens!) Or, be open to the challenge at hand and problem-solve creatively. Maybe the muffle will actually help the purpose of the effect. Or, can you point the speaker upward so it is not shooting directly into props in front of it? Or mount it under a table? This kind of out-of-the-box thinking is really satisfying!

Also, be sure to consider which effects you need to fight for. Often lighting and scenic design have very specific requirements, and that means sound tends to be the design discipline that moves or changes to accommodate them. But sometimes the way a certain element is described in the script or client deck means there are specific sound design requirements. In those situations, it is imperative to put your foot down with the other design disciplines. If an effect calls for an atomic bomb to go off, for example, then you will be needing a subwoofer, and the scenic team will need to accommodate space for that subwoofer in their design. Be a positive collaborator, but be firm, because you can not change physics.

Acoustics & Bleed

When designing for immersive events, you often have to figure out how to cope with bleed from the outside world and even other rooms within the experience. Many immersive experiences are pulsed attractions, meaning they have one audience group starting while people are halfway through the experience, or simultaneous scenes. This makes bleed a really important thing to consider. True isolation is expensive, and I have yet to see an immersive show try to make rooms acoustically isolated. Sound wants are often communicated after the set design, budget, and production timeline have been determined. Many found spaces are unforgiving anyway, such as reverberant warehouses. The following techniques talk about what to do when bleed is apparent, and you have done all you can with acoustic treatment and good speaker placement, tuning, and focus.

One tactic is to embrace the bleed! Evaluate whether it can actually help your sound design. A horror attraction can be made much scarier when people in one room can hear screams coming from another. The next technique is to compromise on what sound effects and music you use. If you have a cheesy piece of music that works for a comedic scene in one room that bleeds into a serious scene in another room, you might need to either lower the cheesy music quite a bit, notch out more present frequencies or potentially pick different music altogether.

The outside world can also be a consideration. I have really enjoyed watching experiences where the outside world is actually a part of an immersive experience. Once I saw a theater production that took place in a graveyard. The natural nighttime atmosphere blurred the lines between what was the real world versus the world of the play. (Super cool!) However, many immersive attractions exist independent from the real world. In this case, you can’t do much about it. Many attractions get around it by making sound and music really loud. And, as you get more bodies in a space, less of the outside world will be heard. And audience members are generally too captivated by the production to notice the world outside!

Regardless of the issue, as you make these discoveries, keep having these discussions with your director. Do a site visit early and anticipate these issues early on and talk about them.

Inspiration Tips

You can gain knowledge and inspiration without working on an immersive project. Everything you apply in sound design for immersive spaces falls under the scientific principles within Acoustic Ecology. As with any type of sound design, start by paying attention to the world around you. What do you hear and where is it coming from? How do things sound different from close up or far away? Keen awareness of the real world can influence creative choices as well as mixing decisions.

Learn all the sound science. Start by looking up the Doppler effect (the pitch of something ascending as it gets closer, like an ambulance siren), occlusion (something blocking a sound), phase cancellation, and literally everything about room acoustics. Research psychoacoustics and how people respond to different frequencies. In a similar vein, learn about loudness metering, because it is weighted by how humans perceive sound. To hear examples of an immersive mix without going to an event, play video games with headphones on. Larger AAA games (some indie too), implement all of these psychoacoustic principles.

Live immersive events are a very fulfilling frontier for those of us with theatrical backgrounds. The process and application are quite different and very in flux throughout, with a ton of collaboration. Understanding the science, forging positive relationships with other departments, and a lot of creative problem solving are the keys to pulling off the suspension of disbelief, and will level up the sound design for your future immersive projects!

Thanks to my editors for reading through this beast and providing feedback: Julien Elstob (lighting designer), Fionnegan Murphy (A/V Integration Engineer), Stephen Ptacek (sound designer).


X