Empowering the Next Generation of Women in Audio

Join Us

The Power Of Finding Your Voice

I recently stumbled across an interesting podcast episode about the power of voice, featuring world-renowned vocal coach Stewart Pearce. A fascinating guest and captivating speaker, Pearce’s celebrity clients have ranged all the way from Princess Diana to Margaret Thatcher, with a healthy dose of Oscar winners and accomplished theatre actors included in the middle.

One of the most intriguing things Pearce talked about, was women reclaiming the power of their voices in the aftermath of the #MeToo movement, and now living a very spiritual and esoteric lifestyle, he claimed that the next chapter of history was more likely than not going to be told by women, rather than the patriarchal model. While that next chapter can at times seem elusive and out of reach observing all the pain, injustice, and oppression in the world around us, we can but hope that it’s on the horizon.

Pearce’s conviction and allyship with women had me intrigued, and so I investigated further into his work. As a taster for his online course, The Magnetic Voice, Stewart offers a three-part masterclass, so of course I delved in.

In addition to his apparent classical, Shakespearean training, there were also somewhat spiritual and less formal elements ingrained into his teachings. The second masterclasses covered: how to create a great voice, your breath power and how to relax, discovering the centre of your authentic voice, acquiring gravitas and personal sovereignty, how to create presence, and evolving your magnetic voice.

I was quite taken by Pearce’s holistic approach to emotional elements of self-confidence and breath work, not just in a performative and vocal speaking/singing sense, but in what felt much more akin to spiritual and yogic practices. Of course, the practical side of breathing from the diaphragm, tone, range, speaking, and singing from the belly and the chest as opposed to the nose or the head were covered, which I was expecting going into the masterclasses. The inclusion of elements such as alignment, grounding, energy work, inner stillness and awareness to become present, also found their place, much to my surprise.

In looking at Pearce’s other works, discovering his 2020 book Diana The Voice of Change illuminated where his passion lay in all of this, and it was clear that sharing the exercises that had worked so well in coaching the Princess during her final years, was a large part of his women’s empowerment mission:

“Diana The Voice of Change is a call to action for women everywhere, for it begins and ends with love. The essence of this book urges the heart of each woman or man to awaken, to heal any breakage within, and so commit to a flow of empathy as an opening impulse for the mighty voice of change. It was Diana’s greatest desire that through her example each woman or man of the world could find their own authentic voice, expressing their own unique purpose, liberating love to transcend enmity. Diana believed that wherever tyranny existed it would be freed by grace, that wherever cruelty existed it would be freed by bravery, and that wherever the voice of oppression occurred it would be freed by the voice of kindness. In this, Diana was a trailblazer!”


The Farlex dictionary defines the idiom of “finding your voice” as:

  1. To find one’s distinctive style or vision of artistic expression.
  2. To regain the ability to speak, especially after something frightening or startling has happened.

The parallels in Pearce’s work between finding your voice and building a strong voice are quite significant. Both are equally important for the transformation of self-discovery, growth, and empowerment. Both entail developing confidence, authenticity, and resilience in expressing oneself and making a meaningful impact in the world, particularly for women.

Speaking authentically, powerfully, and magnetically can certainly be helped with vocal training, mindfulness, breathing exercises, and practicing performance techniques, but is that enough? It became apparent to me that Pearce’s message of “our voices reflect the core of our being” means that we also therefore have to do some work on the core of our being.

Perhaps this inner training and reflection is what will accelerate the confidence in more of us to find our authentic voices, especially as women in a world that isn’t working as well as it should. And in doing so, maybe Pearce’s prediction that the next chapter will be told by the feminine is looking more likely.

An Essential Reading List for Classical Music Recording


Classical music recording is quite a niche area of the audio recording world that can take time and experience to build skills in. Fortunately, there are some excellent books out there by audio engineers who have been perfecting their craft for years, to aid and inspire us in our ongoing learning journeys and the quest for capturing compelling classical recordings. Several of these have become go-to references for many classical audio engineers.

Classical Recording in the Decca Tradition

By Caroline Haigh, John Dunkerley and Mark Rogers

Written by three highly experienced tonmeisters who have worked for Decca and Abbey Road Studios, this comprehensive guide offers detailed explanations of recording techniques (such as the Decca tree) and useful diagrams and photos. It covers all kinds of formats from solo instruments to large ensembles, orchestras and operas.

Recording Orchestra and Other Classical Music Ensembles

By Richard King

Another comprehensive exploration of recording techniques, written by a Grammy award-winning recording engineer and professor. It also has useful sections on the role of the producer, productions with video, and multi-channel recording as well as “Quick Start Guides” labeled by ensemble type.

New Stereo Soundbook

By Ron Streicher and F. Alton Everest

A guide that delves into stereo perception and recording, exploring what it is, how it works, and how to use microphones to achieve stereo effects – knowledge that is central to classical music recording. It includes a glossary of terms, basic principles of stereo microphone techniques, binaural techniques, multiple-mic recording, the early history of stereo techniques, and how to optimise listening environments.

Recording Music on Location: Capturing the Live Performance

By Bruce Bartlett and Jenny Bartlett

Classical recording more often than not involves recording on location in different venues, and this book provides lots of information on recording outside of the studio, including a section on classical music. Other useful chapters include gear and pre-production, and in-depth explanations of stereo and surround recording techniques.

Concert Halls and Opera Houses: Music, Acoustics, and Architecture

By Leo Beranek

Called the “definitive work on the architectural acoustic design of classical music spaces”, this book is an illustrated guide to 100 concert halls and opera houses throughout the world. It explores how architectural features affect acoustical aspects such as reverberation time and frequencies, and how this relates to classical music of different periods. It also features comments from conductors and musicians on how acoustics affect their performances.

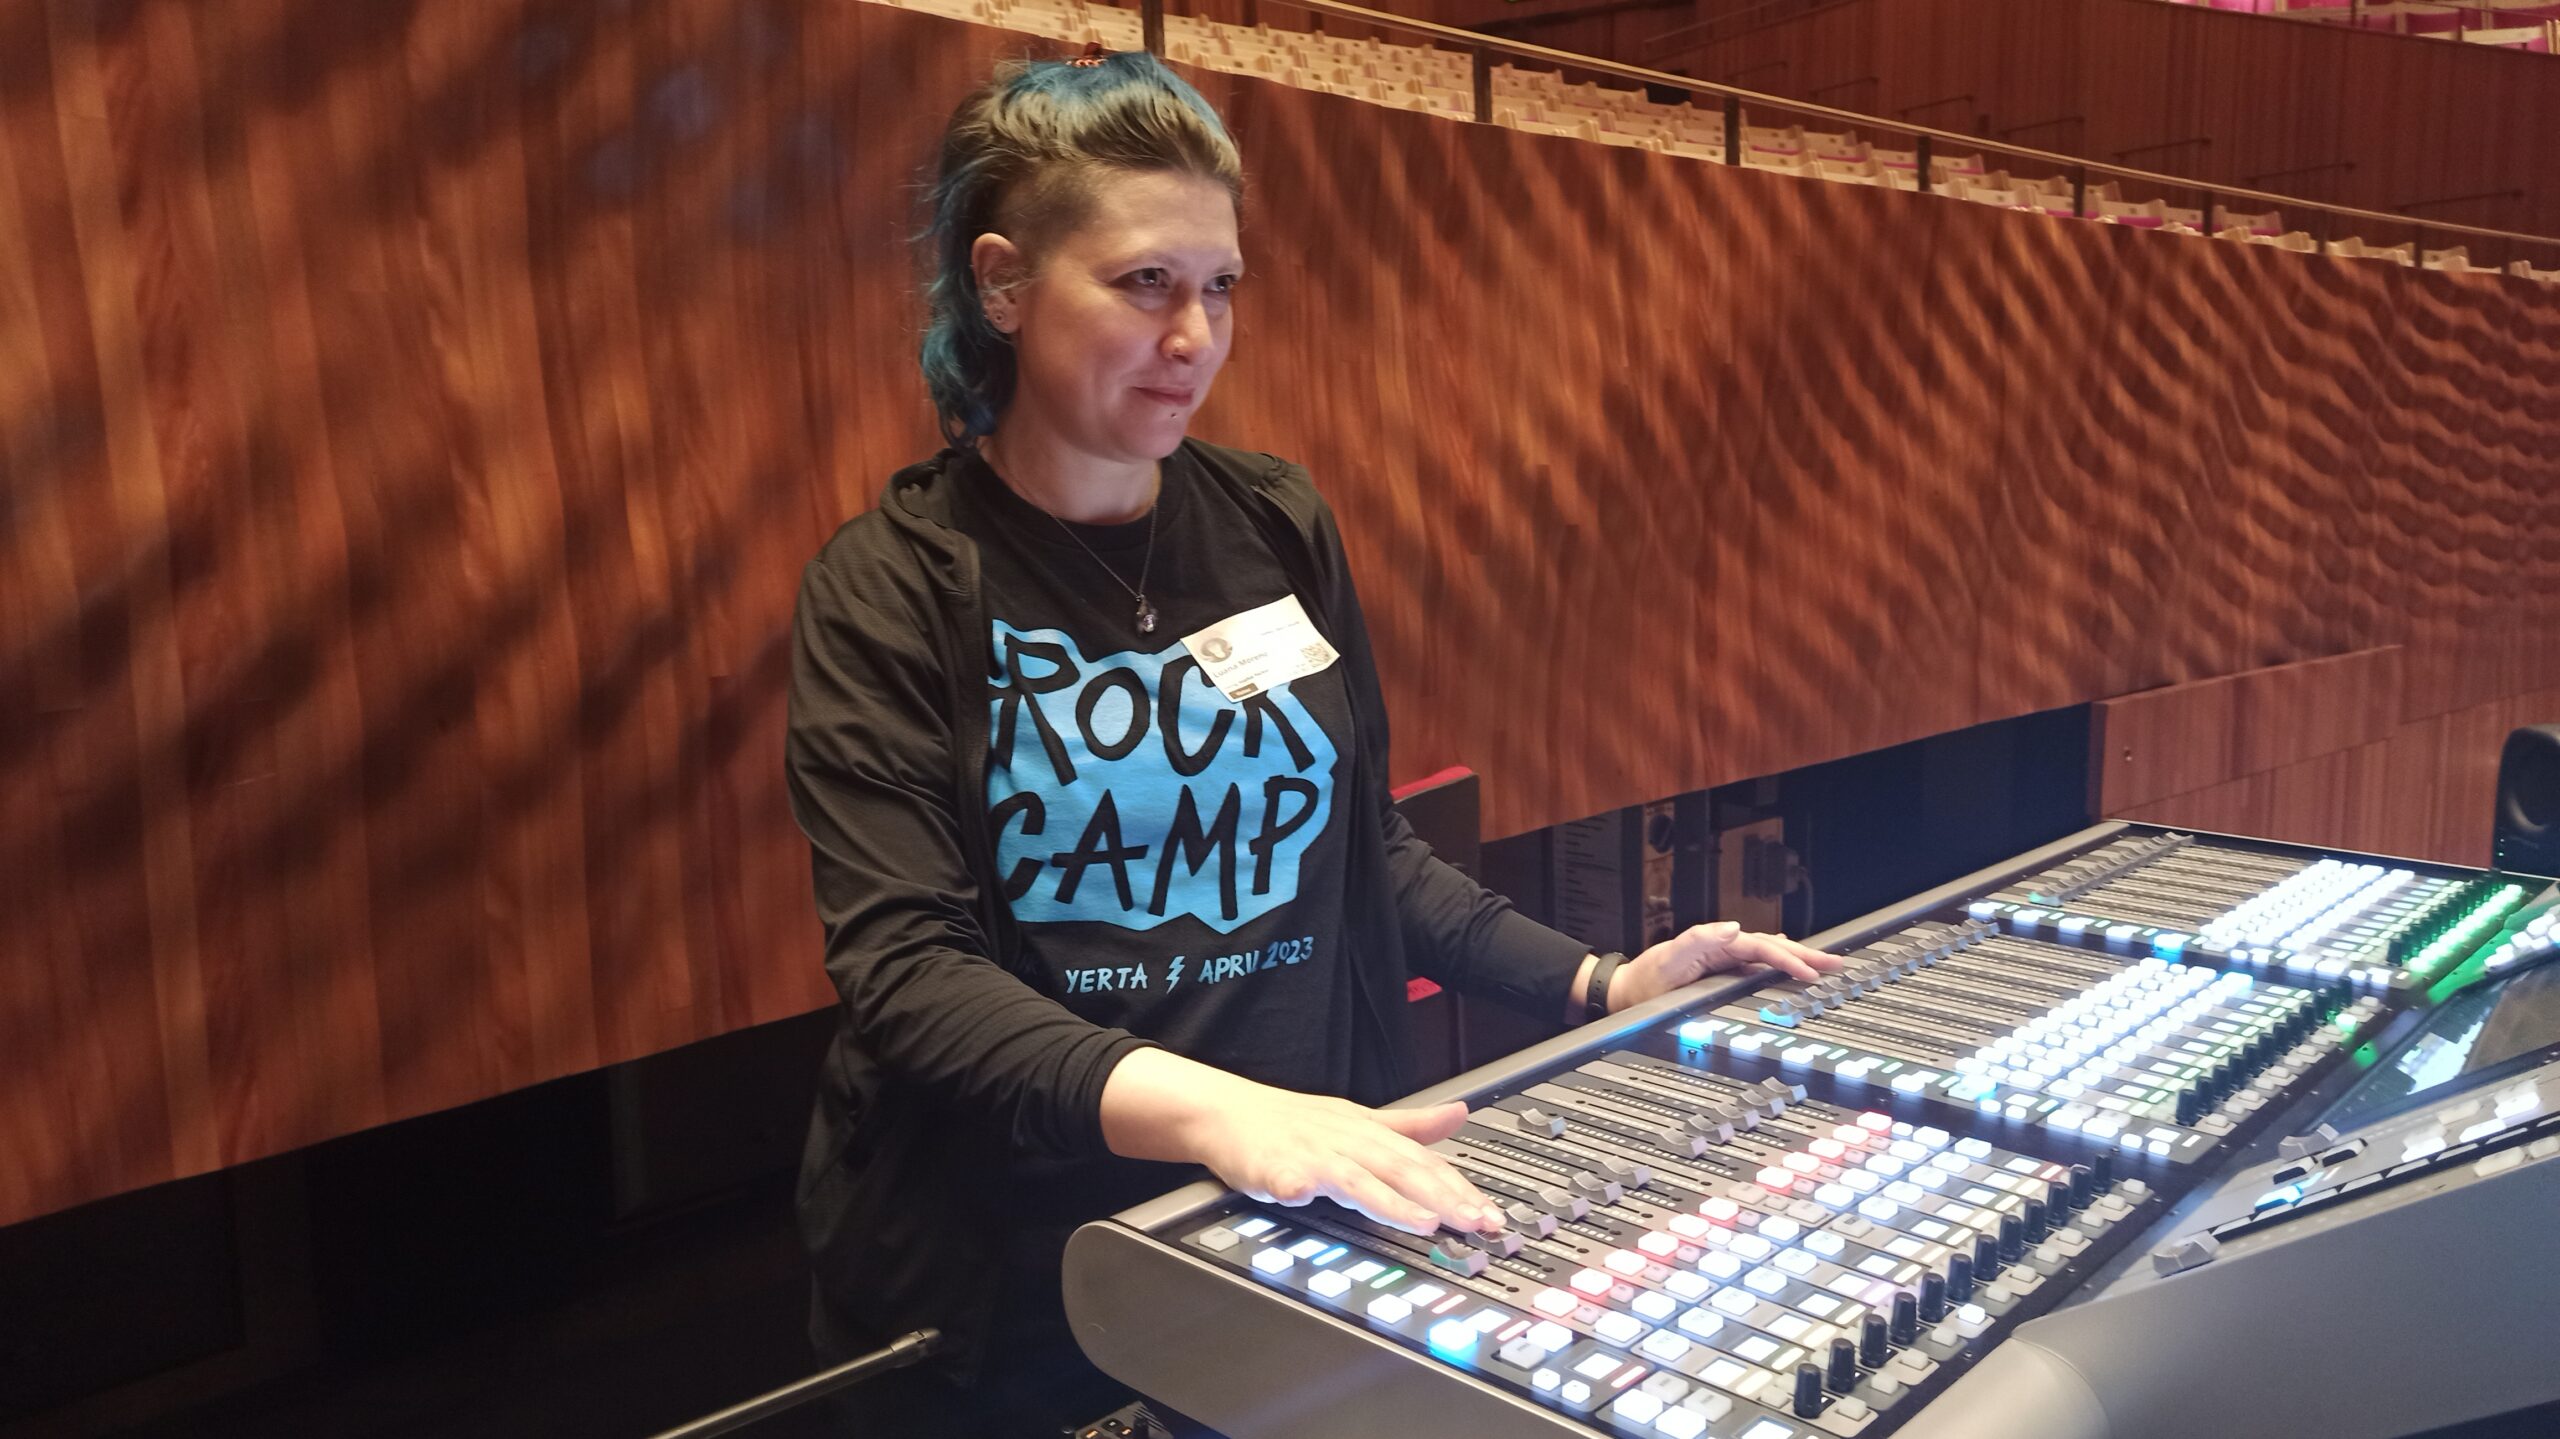
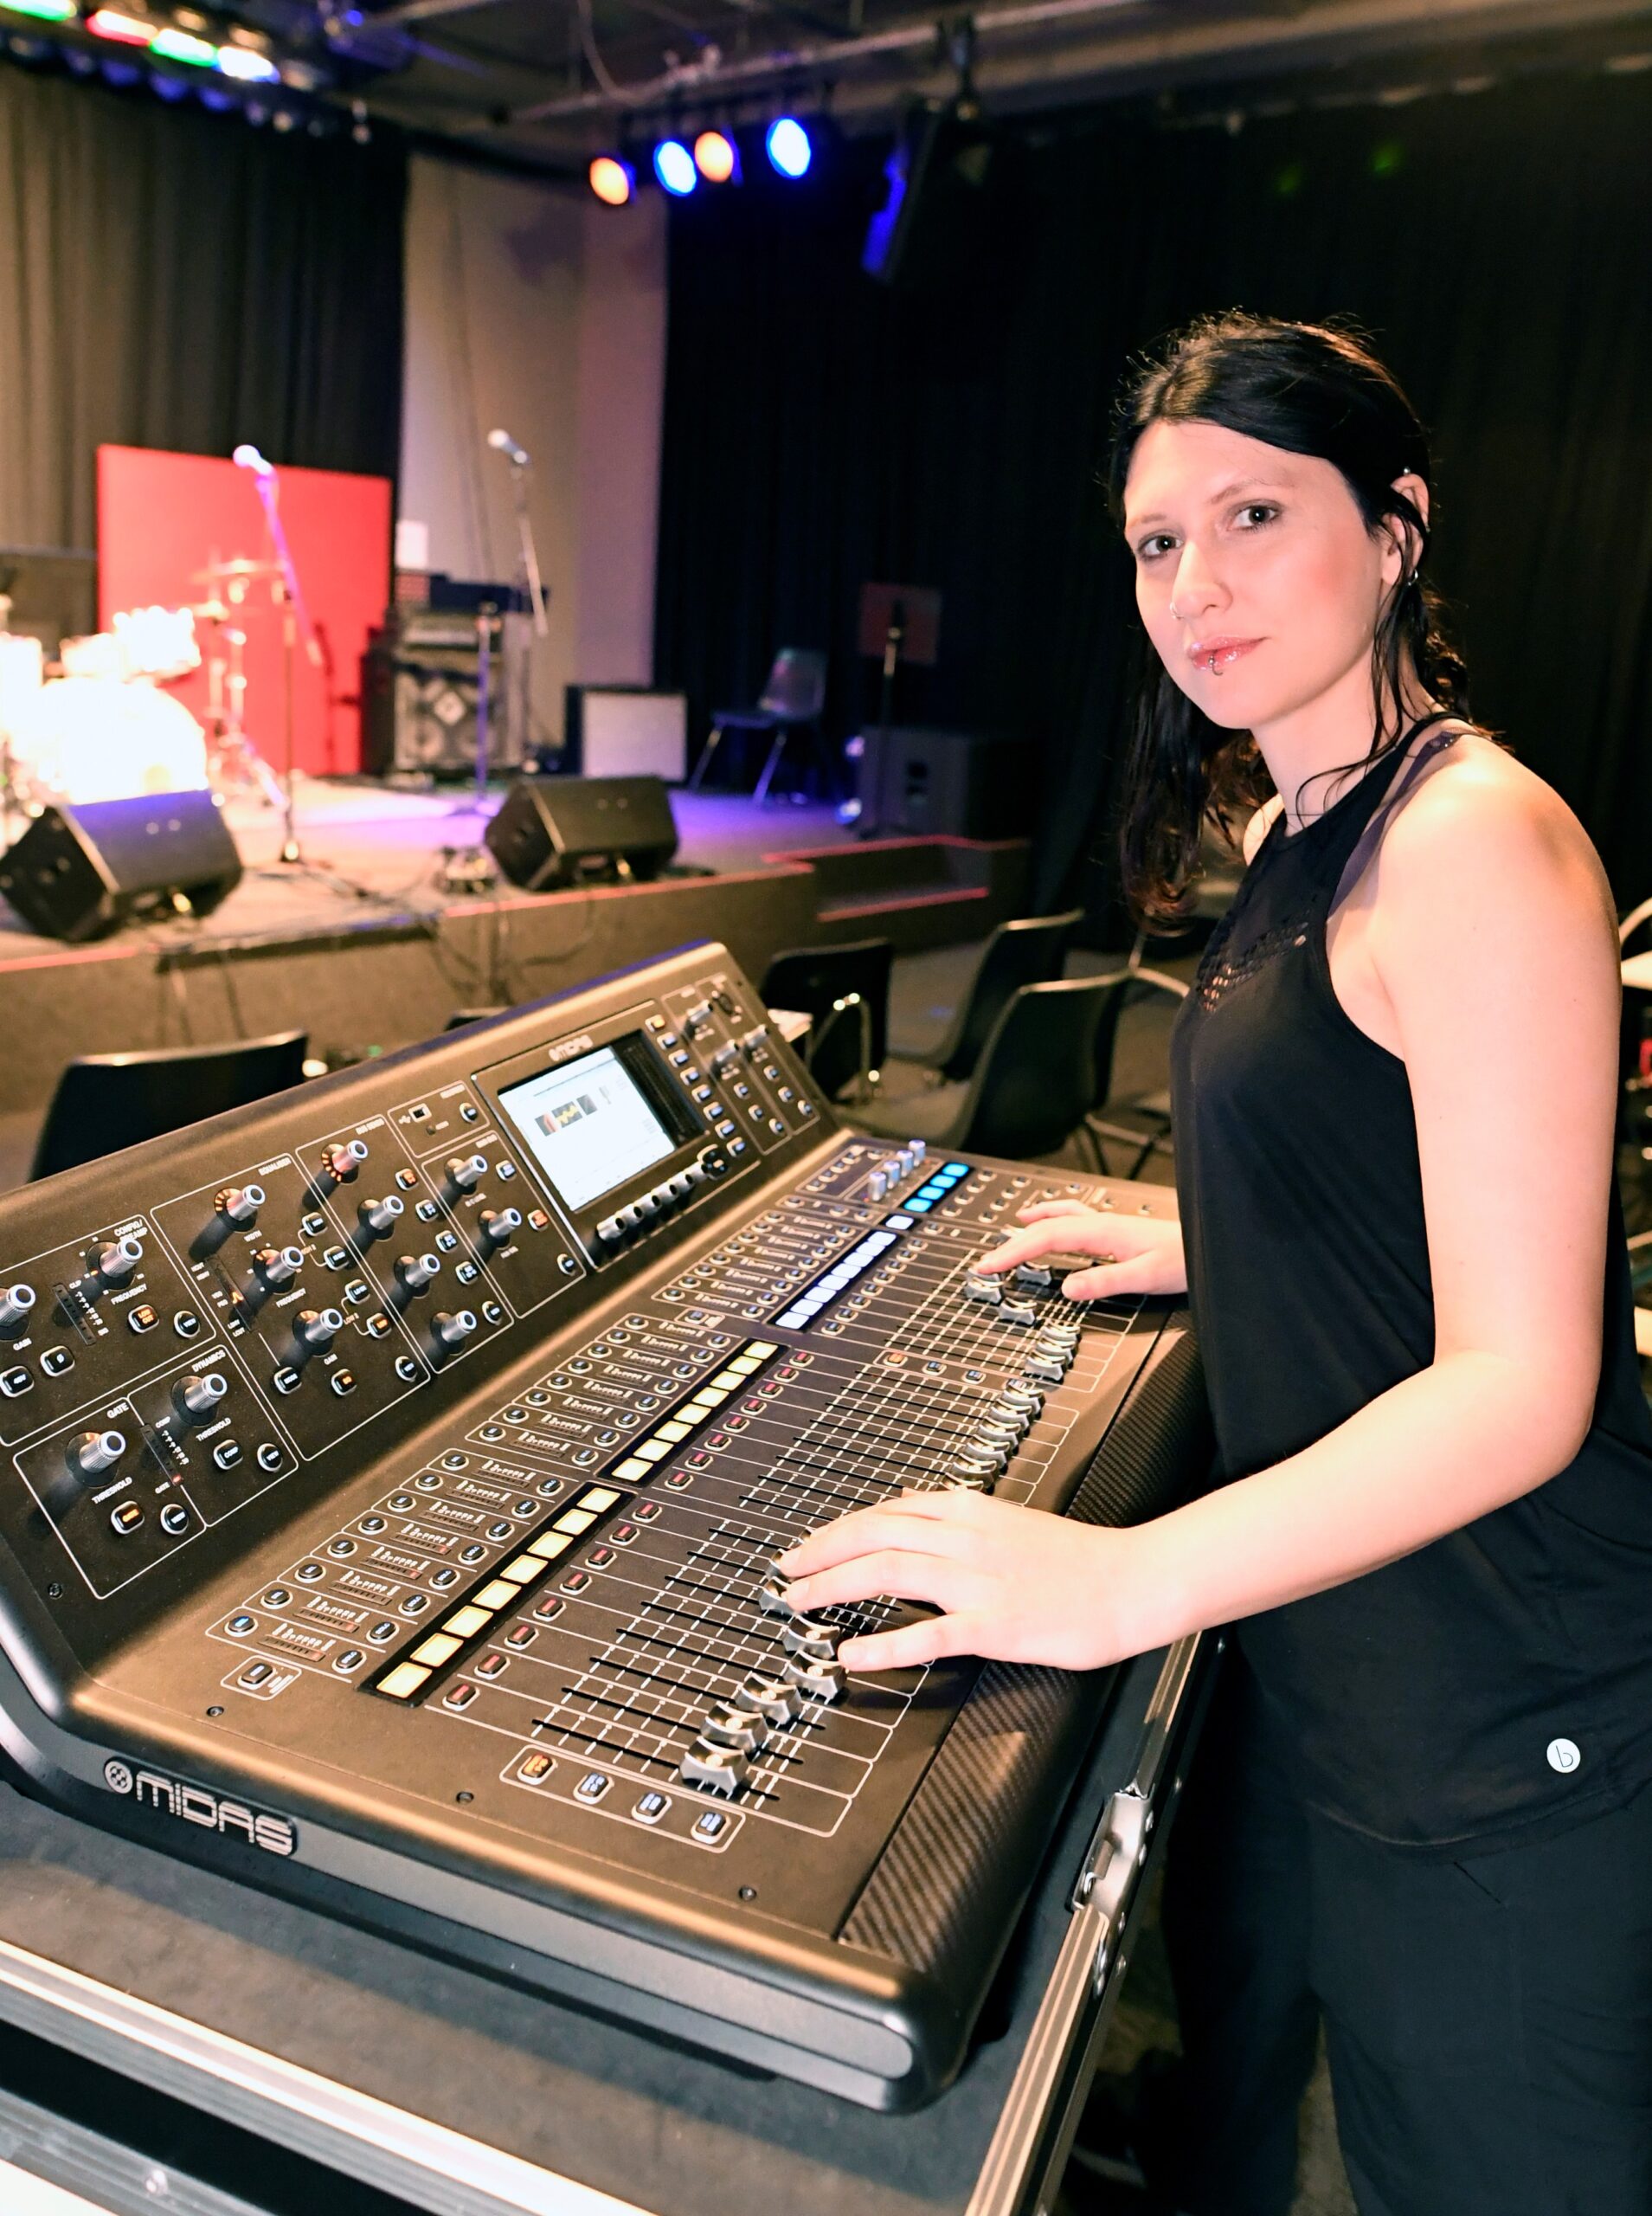
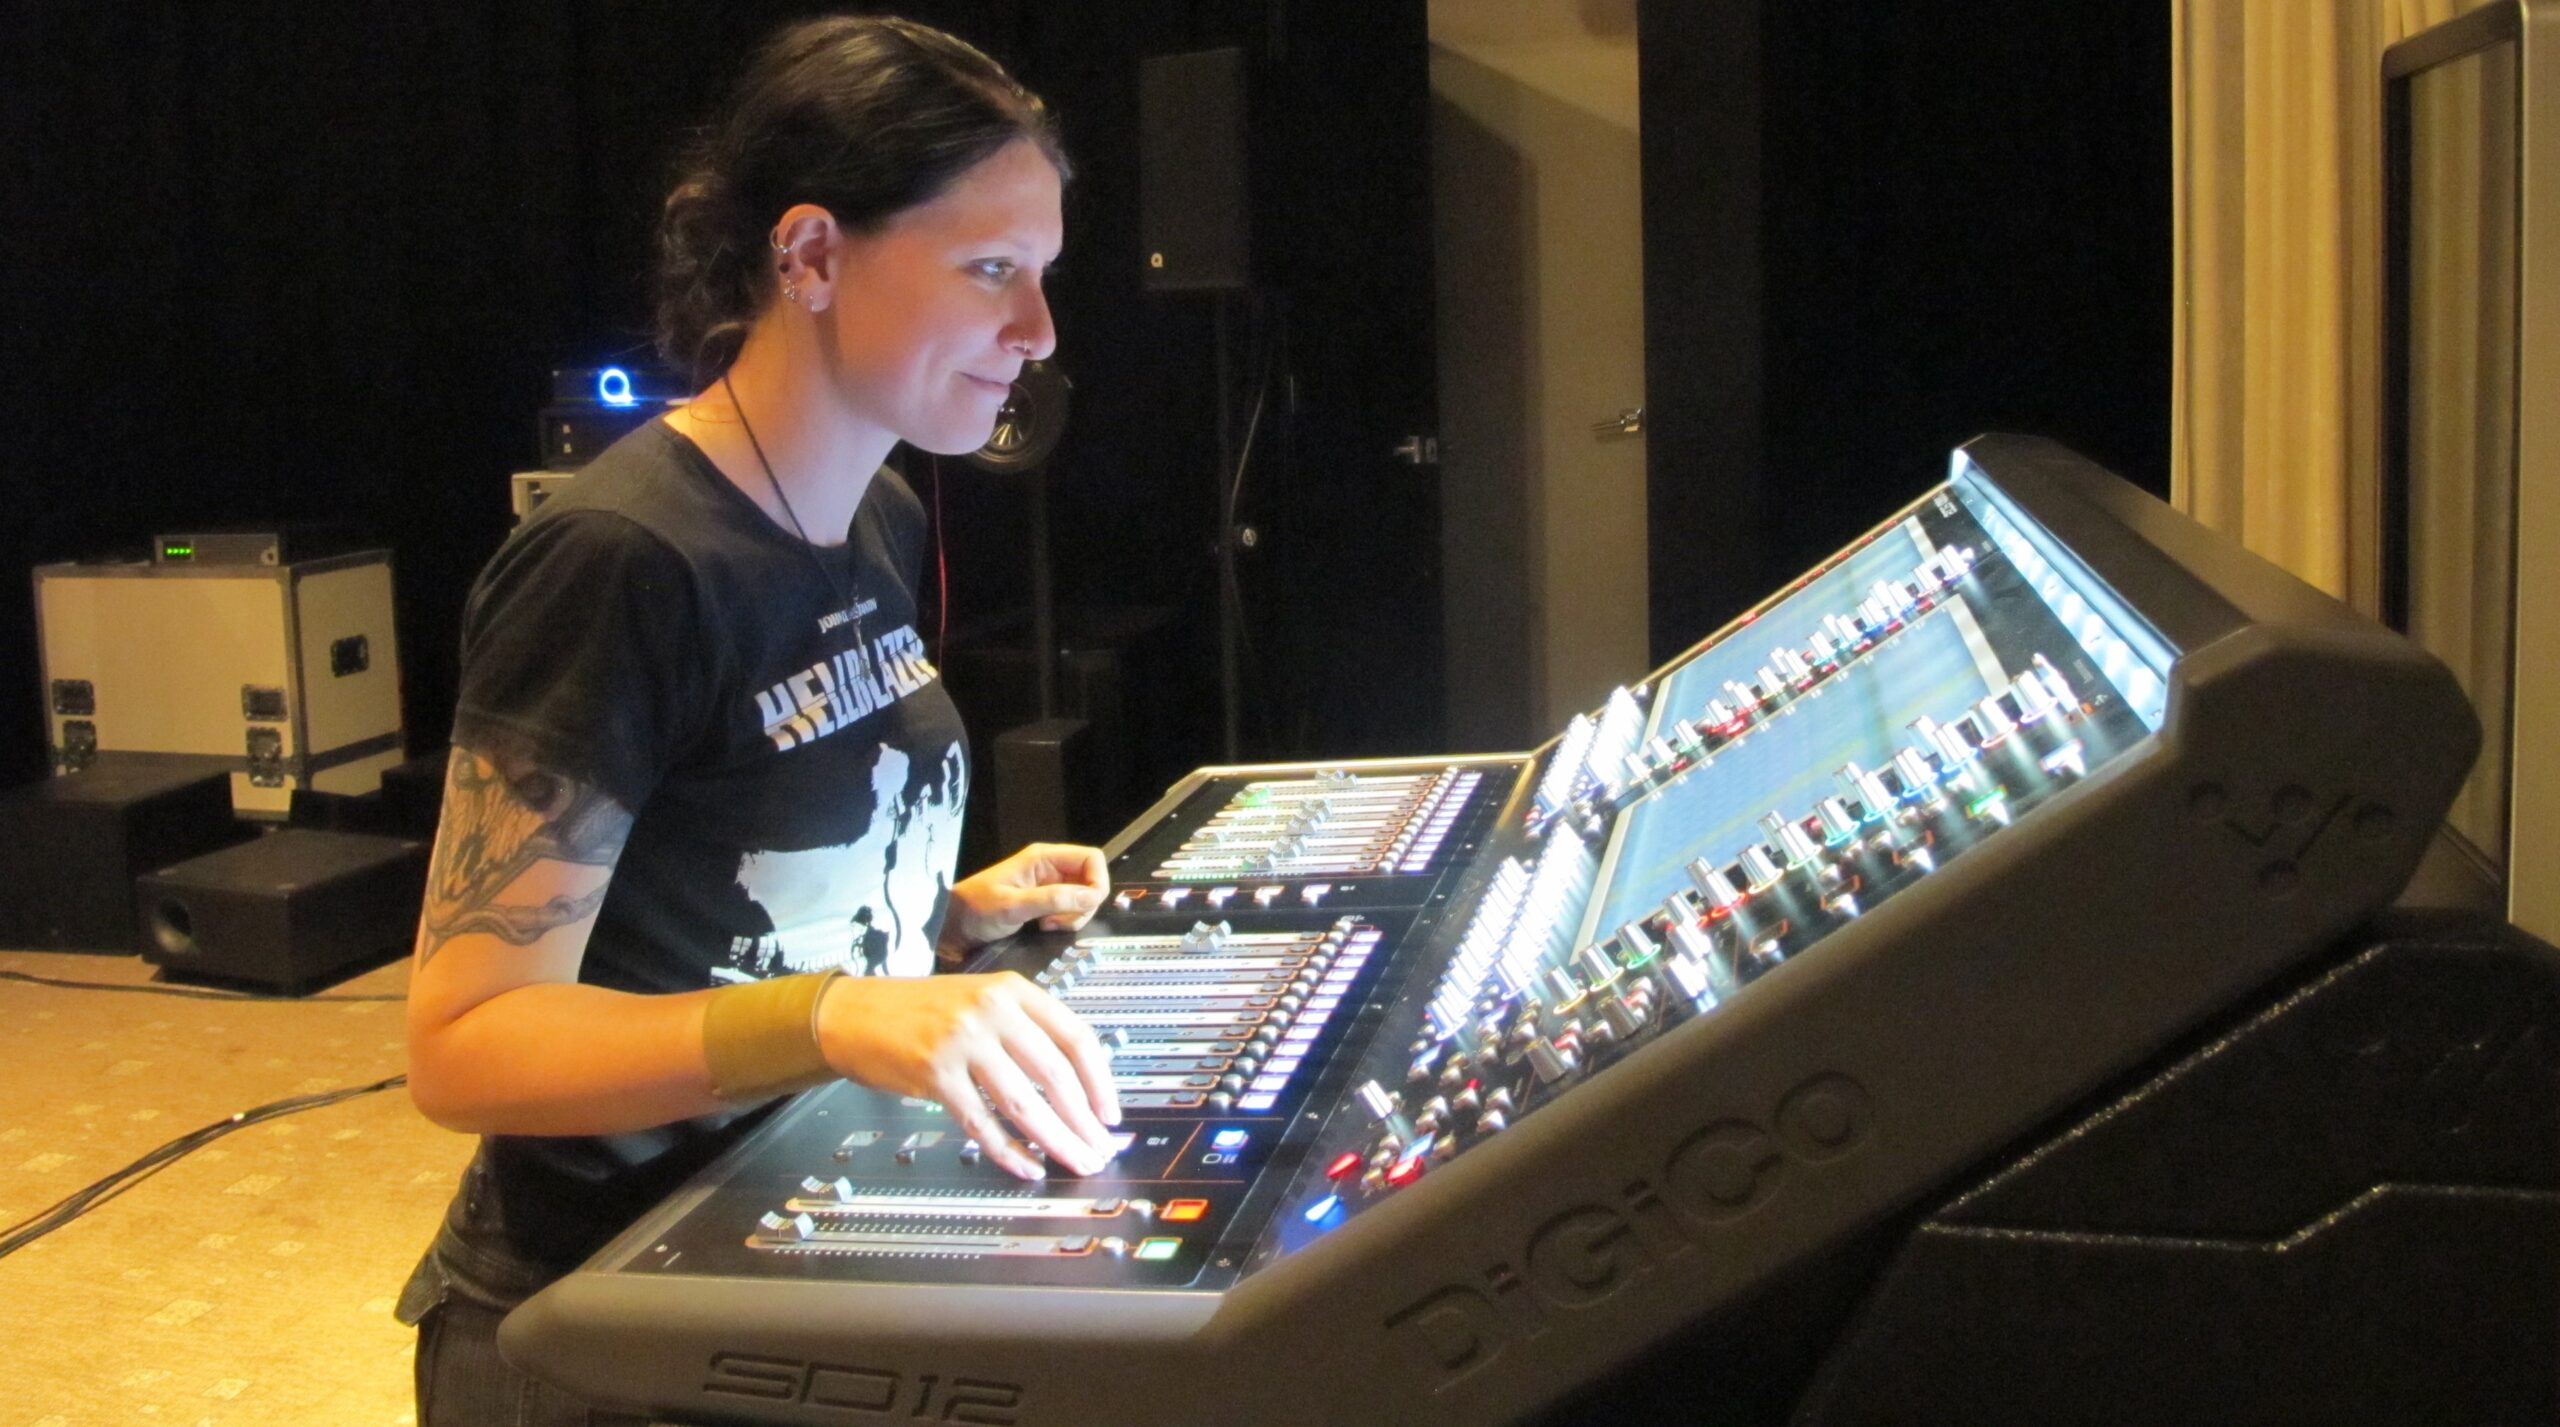
Luana Moreno – Live Sound and Recording Engineer

Luana works as a freelance engineer working with venues, rental companies, musicians, and event organizers. She currently is in the process of setting up a small commercial studio. She has been working in audio for over 15 years. Luana is originally from Brazil and now resides in Adelaide, Australia.

Luana fell in love with music when MTV came to Brazil. “I still remember watching Slayer’s “Seasons in the Abyss” and my mind was completely blown away. I bought my first CDs, Smashing Pumpkins, The Cure, Sepultura, and Hole, and became a total aficionado. I bought an electric guitar with the first payment from my first job. I have her to this day.”

Luana was introduced to audio after a recording session with her band and became interested in the recording process. She began to research courses and programs for audio engineering and also met a producer and engineer Paul Anhaia who worked at Midas Studio. She would take a short course on Audio Fundamentals where she learned the basics and then learned on the job from there. All the while Luana attended workshops and training opportunities. In 2013 Luana enrolled at Melbourne Polytechnic and received an Advanced Diploma in Sound Production in 2019.  Luana says this “doesn’t mean that I have stopped learning though, as I am always looking to learn and keep up with the industry innovations”.
Career Start

How did you get your start?

My first job was at a studio/mobile recording facility called Audiomobile. They had two mobile recording units at the time, a bus and a truck. They did a lot of recordings for music DVDs. I would rarely be on-site recording, but in the studio helping them organize the hard drives and doing general maintenance. I would often sit through mixing sessions with the other techs too.

From there I started mixing live sound at nightclubs and other venues and working for rental companies and artists in Brazil. There I also had the opportunity to do location recording and post for film for a considerable time at MeuSucesso.com and to do mixing and mastering for a few bands.  Moving to Australia I was able to get into the Live entertainment quite quickly and have only run out of work during the first six months of Covid.

How did your early internships or jobs help build a foundation for where you are now?

I think Audiomobile had the most impact because that’s where I learned how the industry worked and was able to sit in on sessions with talented and skilled technicians who didn’t mind sharing their process. Mixing in pubs and nightclubs was a great school as well because we would often be quite limited in terms of what the equipment was capable of, and that’s where I learned to work with whatever I had available.

What did you learn interning or on your early gigs?

Shadowing the other techs at Audiomobile was a great opportunity to train my ear and get up to speed with the basics, and at the pubs and rental companies I’ve learned how to set up a system, troubleshoot it, and make things work. It was also where I learned how to mix.

Did you have a mentor or someone that helped you?

Paulo Anhaia, whom I dated at the start of my career, was more of a supporter and role model than a mentor. The techs at Audiomobile who taught me in my early days: Egidio Conde, Fernando Ferrari, Luiz Leme, Eduardo Garcia.

The group of people who helped me for the longest time in my professional life were my colleagues from Mulheres do Audio( Audio Women), a group that started when I created a Facebook group after working at an AES conference as a Product Specialist and being confused for a “booth model” by the male attendees, who’d ask me, surprised: “You’re a Sound Tech? How many more women in sound are out there?”

That question got me thinking and one night I created a Facebook group and invited some of my mates: Adriana Viana, Lilla Stipp, among others. That group started regular gatherings, where I met many other incredible women who have supported me in my journey, such as Florencia Saravia-Akamin, who played that mentorship role being the most experienced of us; Roberta Siviero, who if I recall correctly introduced us to SoundGirls and organized our meeting with Karrie Keyes when she toured Brazil with Pearl Jam; Regiane Alves, Allyne Cassini, among others.  All of these women became a network, exchanging information at the meetings, organizing workshops, and referring each other for jobs.

Moving to Australia I had to start from scratch, so Toni Venditti’s help was instrumental as she offered me insights and contacts. Other people worth mentioning would be my teachers at Melbourne Poly, Shane Simmonds, Tamara Weaver, and David Rodger, and my mates Erica D’Angelo and Candace Parham. All of these people were in one way or another instrumental in opening a door, answering a question, or giving me advice when I needed it. It might sound like an Oscar acceptance speech, but it truly takes a village!
Career Now

What is a typical day like?

I have no such thing. Working for three different companies as an employee and several other clients, some days I’ll start at 5 am and some I’ll finish at 2 am. So I try to organize my calendar in advance.

On days I’m not working out of the home, I will normally take the morning off and get things done in the afternoon or early evening. I also make sure to schedule days off, where I’ll do only leisure things or nothing at all, depending on how I feel.

How do you stay organized and focused?

I do my best! Sometimes I can’t be as organised as I’d like, but I have learned to not beat myself up about it. After all, managing your schedule as a freelancer is a challenge.

Some items that help me be as organized and focused as I can be are:

Besides these, plenty of water, coffee, chewing gum, regularly exercising/ stretching, and taking breaks when I can afford to, are the main strategies that I use. Taking time to plan for the gig whenever possible. But I think the most important thing is to manage your workload the best you can because, without enough rest, all of that is irrelevant.

What do you enjoy the most about your job?

The variety. Being a casual/freelancer allows me to work in different places with different people doing varied things. I enjoy wearing several hats, even if it’s challenging at times.

What do you like least?

Heavy lifting, defective gear, and difficult clients.

If you tour what do you like best?

I did tour a bit but it wasn’t for me, so I never really pursued it. I found that it’s quite stressful and you go to great places but don’t get time off to enjoy yourself.

What is your favorite day off activity? 

If I’m tired, reading in bed, playing casual games, and watching sci-fi and horror series. If I’m not too tired playing music, gardening, or going out with my partner, be it a museum, concert, movie, or dinner.

What are your long-term goals?

Grow and diversify my business, by opening my mixing studio to offer music production, mixing, mastering, and sound for film more consistently, and do more event production management. Help musicians and other creatives achieve their vision and release my projects as an artist. Continue to support the next generation of sound engineers and musicians with education and mentoring, through workshops, courses, and being involved in initiatives like Girls Rock Camp and The Tech Sisters.

What if any obstacles or barriers have you faced?

I have faced sexism for sure, especially when I was starting out. Bands would arrive at the venue and ask “Are YOU mixing?” and I’d be like “ Well if you don’t want me to you can do it yourself!” and that has always been my stance. Of course, in many situations, nobody says those things to your face, so all you can do is do your best and not worry about it. I think it acts as a filter, a place that won’t hire me because I’m a queer migrant woman is not a place where I want to be.

The other big one is toxic work environments, of which I have tasted many flavors: the ‘we are family”, the abusive manager, and the threatened colleague. It can be hard to spot at first, but once you start seeing the red flags, you can’t unsee them.

How have you dealt with them?

I have learned early on to stand up for myself and to find out whether a gig is worth the trouble or not. But the thing that has made the biggest difference for me was seeking community. Having the support of other women/GNC people who understand your struggles and where you’re coming from. Who can relate and offer advice based on their lived experience. Not to downplay the support of some awesome guys I’ve met, but groups like Mulheres do Audio, and SoundGirls have been instrumental in helping me overcome these issues.

Advice you have for other women who wish to enter the field?

Do it! There are more of us than ever and we are stronger together! Connecting with other women and gender-diverse people, SoundGirls is a great place to start. Find your local community and chances are they’ll have your back.

Must have skills?

Broad musical taste, decent hearing, curiosity, interest in lifelong learning, and the ability to learn by yourself, because changes in the industry are constant and often you need the knowledge before you can consult with someone else. I believe that basic musical knowledge is a great advantage for audio technicians. No need to study Schoenberg but knowing rhythmic figures, harmony, and scales can help you a lot, both live and in the studio.

Favorite gear?

For live, any modern digital console with enough graphic eqs is fine. I’m partial to dB Technologies systems as they normally sound quite good just out of the box, and Allen & Heath consoles. The most useful items in my toolkit, besides tape and Sharpie, is undoubtedly my iPad and a router. That was the best investment I made because it helps immensely with line checks, tuning, and naming channels.

In the studio, I love Genelecs, Tannoy, Reaper, and plugins from FabFilter, Plugin Alliance, UAD, and iZotope.

Anything else you want to add?

The entertainment industry is a hard one and many toxic narratives in it need to go! Being proud of doing 80-hour weeks, the boys club, abusive behavior, and the glamorization of booze and drugs as things that are tolerable and even desirable in workplaces are unfortunately still quite common and anyone within it will likely have to deal with these issues from time to time. Still, there is a pushback against these things, especially by younger people, and I’m fully in support. Particularly in regards to long hours, yes sometimes they are inevitable due to specific circumstances, but if they are always the rule, that’s a management issue. Don’t let anyone tell you that you need to subject yourself to these things if you want to succeed in this business. There are alternatives and many opportunities to do what you love without sacrificing your mental and physical health. Boundaries are good in any relationship, professional or personal, and those who don’t respect them don’t deserve you!
7 tips for Making Your Recording Session Go Smoothly

As a freelance music producer and recording engineer, the recording sessions are a key component of your business. The success of the recording sessions directly impacts the quality of your final productions. With a little bit of forethought, you can ensure that the sessions go smoothly, resulting in an overall much better experience, as well as high-quality music.

Have a pre-production meeting with the artist prior to the recording session(s) so there are no surprises.

There will be no greater obstacle to overcome than having to figure out what the vision for the project is during the recording session. As a producer and engineer, unless YOU are the artist, your job is to bring the artist’s vision to life. They are depending on you and your expertise to make sure their vision is realized. They don’t know what you know, in most cases, so it is up to you to have a thorough pre-production discussion beforehand. This should drive the approach to the production of the entire song and will bleed into each recording session with every musician.

Make sure everything works at least the day before.

A cable can work one day and then start crackling the next. A tube can blow overnight. Even your computer can suddenly go out. Check all of the equipment you are planning on using for the recording session the day before. Fire everything up, do a quick mock take of something, listen back, and make sure all is working as it should.

Have everything on and warm before the session is to begin.

Turn everything on at least an hour before to give the equipment enough time to warm up. This will also allow you to double-check that everything is working (even though you checked the day before, something could still go out overnight, right?)

Keep your space clutter-free, clean, and comfortable.

Do a basic overview of the space to make sure there’s no dust or clutter. Check the bathroom and make sure it is properly stocked and clean. Make sure the room has lighting options, depending on what the musician or artist might need. Many studio owners (including myself) have fancy LED lights with various colors so we can create moods in our studio space. I always let the artist know that I can adjust the colors to be whatever they want. Sometimes I’m asked to remove all color and make the lights white and bright because they are reading sheet music. Be ready to accommodate so that the artist/musician is comfortable. Temperature can be a tricky element of home recording spaces as well. You’ll have to turn off the AC or furnaces to remove background sound, so be prepared for that. You may need to open doors or turn on AC during breaks or have space heaters nearby to bring some heat.

Give yourself a buffer of time between sessions.

People run late, sessions run long. Cramming sessions too close to one another will create a more stressful situation for you, keeping you from being your best. If the artist or musician is rushed at any point during their session, their performance will likely be hindered. By the same token, really long sessions with no pre-production meeting ahead of time can be very tiring and can wear everyone out. Only book sessions as long as you want and are comfortable with and definitely don’t push a vocalist to sing for longer than 4 hours. Most vocalists don’t have that kind of stamina.

Do not overbook yourself.

Make sure you are prioritizing your mental and physical health. Make sure you are getting enough sleep, eating well, and getting outside for a little walk (at least) once a day. The session will only be as good as the engineer.

Have rules and boundaries for your studio.

To keep your studio environment healthy and conducive to creativity but also technical quality, you need to create rules for your studio. You also need to be ready to enforce them. What these rules need to be is up to you and may change over time. Remember, it is your space and you are the one in charge.

Paradoxes In Vocal Editing

I tend to procrastinate recording vocals for my original songs because I get so worked up about recording my voice perfectly. I worry about making sure my recordings are high quality: I’ve minimized outside noise, gain staged properly, warmed up my voice, am conveying emotion and proper pitch, and have enough takes to work with. Keeping track of all this can be so overwhelming that most of the time when I feel ready to record, I just want to do one take and be done with it. So many singers before the age of digital recording were performing single takes, so why can’t I? Of course, if I’m not careful with my recording takes, I end up spending more time in iZotope RX and Melodyne cleaning up noise, mouth clicks, and pitch anyways. Since a lot of my music is electro-pop-based, the vocal editing needs to be clean so that it fits the production and the genre.

I can’t help but feel like a minimal amount of vocal editing gets us closer to authentic performance, and yet we have all these new technological tools that we can use to produce a perfect Pop vocal. In diving into the philosophy of vocal editing instead of actually doing it, I rediscovered a short clip of Billie Eilish demonstrating vocal comping to David Letterman, which you can view here if you haven’t seen it yet. She and Finneas O’Connell walk through editing of the lead vocal for her song “Happier Than Ever” and point out how almost each word is a separate take. They don’t use autotune and instead take extra time during the recording process to make sure every syllable in every phrase is perfect in pitch and tone and time. They do this seamlessly so that upon playback you really can’t tell that these takes are separate. Most producers do this, and the O’Connells did not invent this technique, yet I’m mostly impressed by the sheer resilience it takes to record the same word or syllable over and over again without completely losing your mind.

Another video I found, which you can view here, shows Charlie Puth recording, comping, and editing his vocals very meticulously. He splits up the recording of a two-syllable phrase just so he can use pitch shifting to sing the higher note of the phrase at an easier pitch for him. To be clear, instead of recording himself singing an octave up, he uses SoundToys Little Alter Boy to pitch his voice down and sing a lower note, which he then pitches back up to the right key so it sounds like his tone is fuller when he sings higher. He also punches each note in over and over until he gets the result he wants instead of playlisting and comping later, and he manually lines up harmony takes in Pro Tools instead of using Vocalign. He really uses the DAW itself as the editing tool instead of other plug-ins, and his philosophy is that since we are privileged to have this technology, it’s worth taking the time to make a quality edit.

I yearn to master these techniques confidently and efficiently. As someone who gets overwhelmed easily, I usually record until I get a take I like instead of playlisting. I also realize that quickly comping multiple takes in the moment of the recording process is super valuable despite it resulting in the derealization of my own voice. More than anything, I want my voice to sound like my voice, which usually takes a lot less thinking and tinkering and a lot more feeling and emotion. Still, as a low-budget indie artist wearing almost all the hats, how can I decide if perfecting the performance is a better use of my energy than mastering comping and editing techniques? I admire you if you have the energy to do it all.

I’m always reminded of how Stevie Wonder records. For Songs In the Key of Life, nothing was spliced, and takes were rerecorded instead until they were right. This seems frustrating, but Wonder’s elite musicianship made this a viable process. Four years before this record was out, “Superstition” was recorded with a world of mistakes. This is one of my favorite recordings because it’s radically authentic. The squeak of the kick pedal lingers throughout the track, and if you listen closely you can hear the brass players discussing their parts since they didn’t get time to practice.

So, I might be a little biased towards how I define an authentic recording based on how accurately it conveys emotion and how close it feels to a one-shot live performance, which is a little old-school. However, when I record and edit my own vocals, I usually end up using one or two takes. I clear out the mouth clicks with RX, I tune the important notes in Melodyne, and I try to think about it as little as possible. I know that a little extra elbow grease in each step of the process might give me a perfect result, but I completely disconnect from the point of recording when I start on that journey. I tend to view authenticity and perfection as opposites, but learning about how other producers approach this work shows me that authenticity and perfection thrive on reciprocity. I don’t know if there’s a right way to edit vocals, but I know that no one can tell you the right way to do it.

Recording an Orchestra


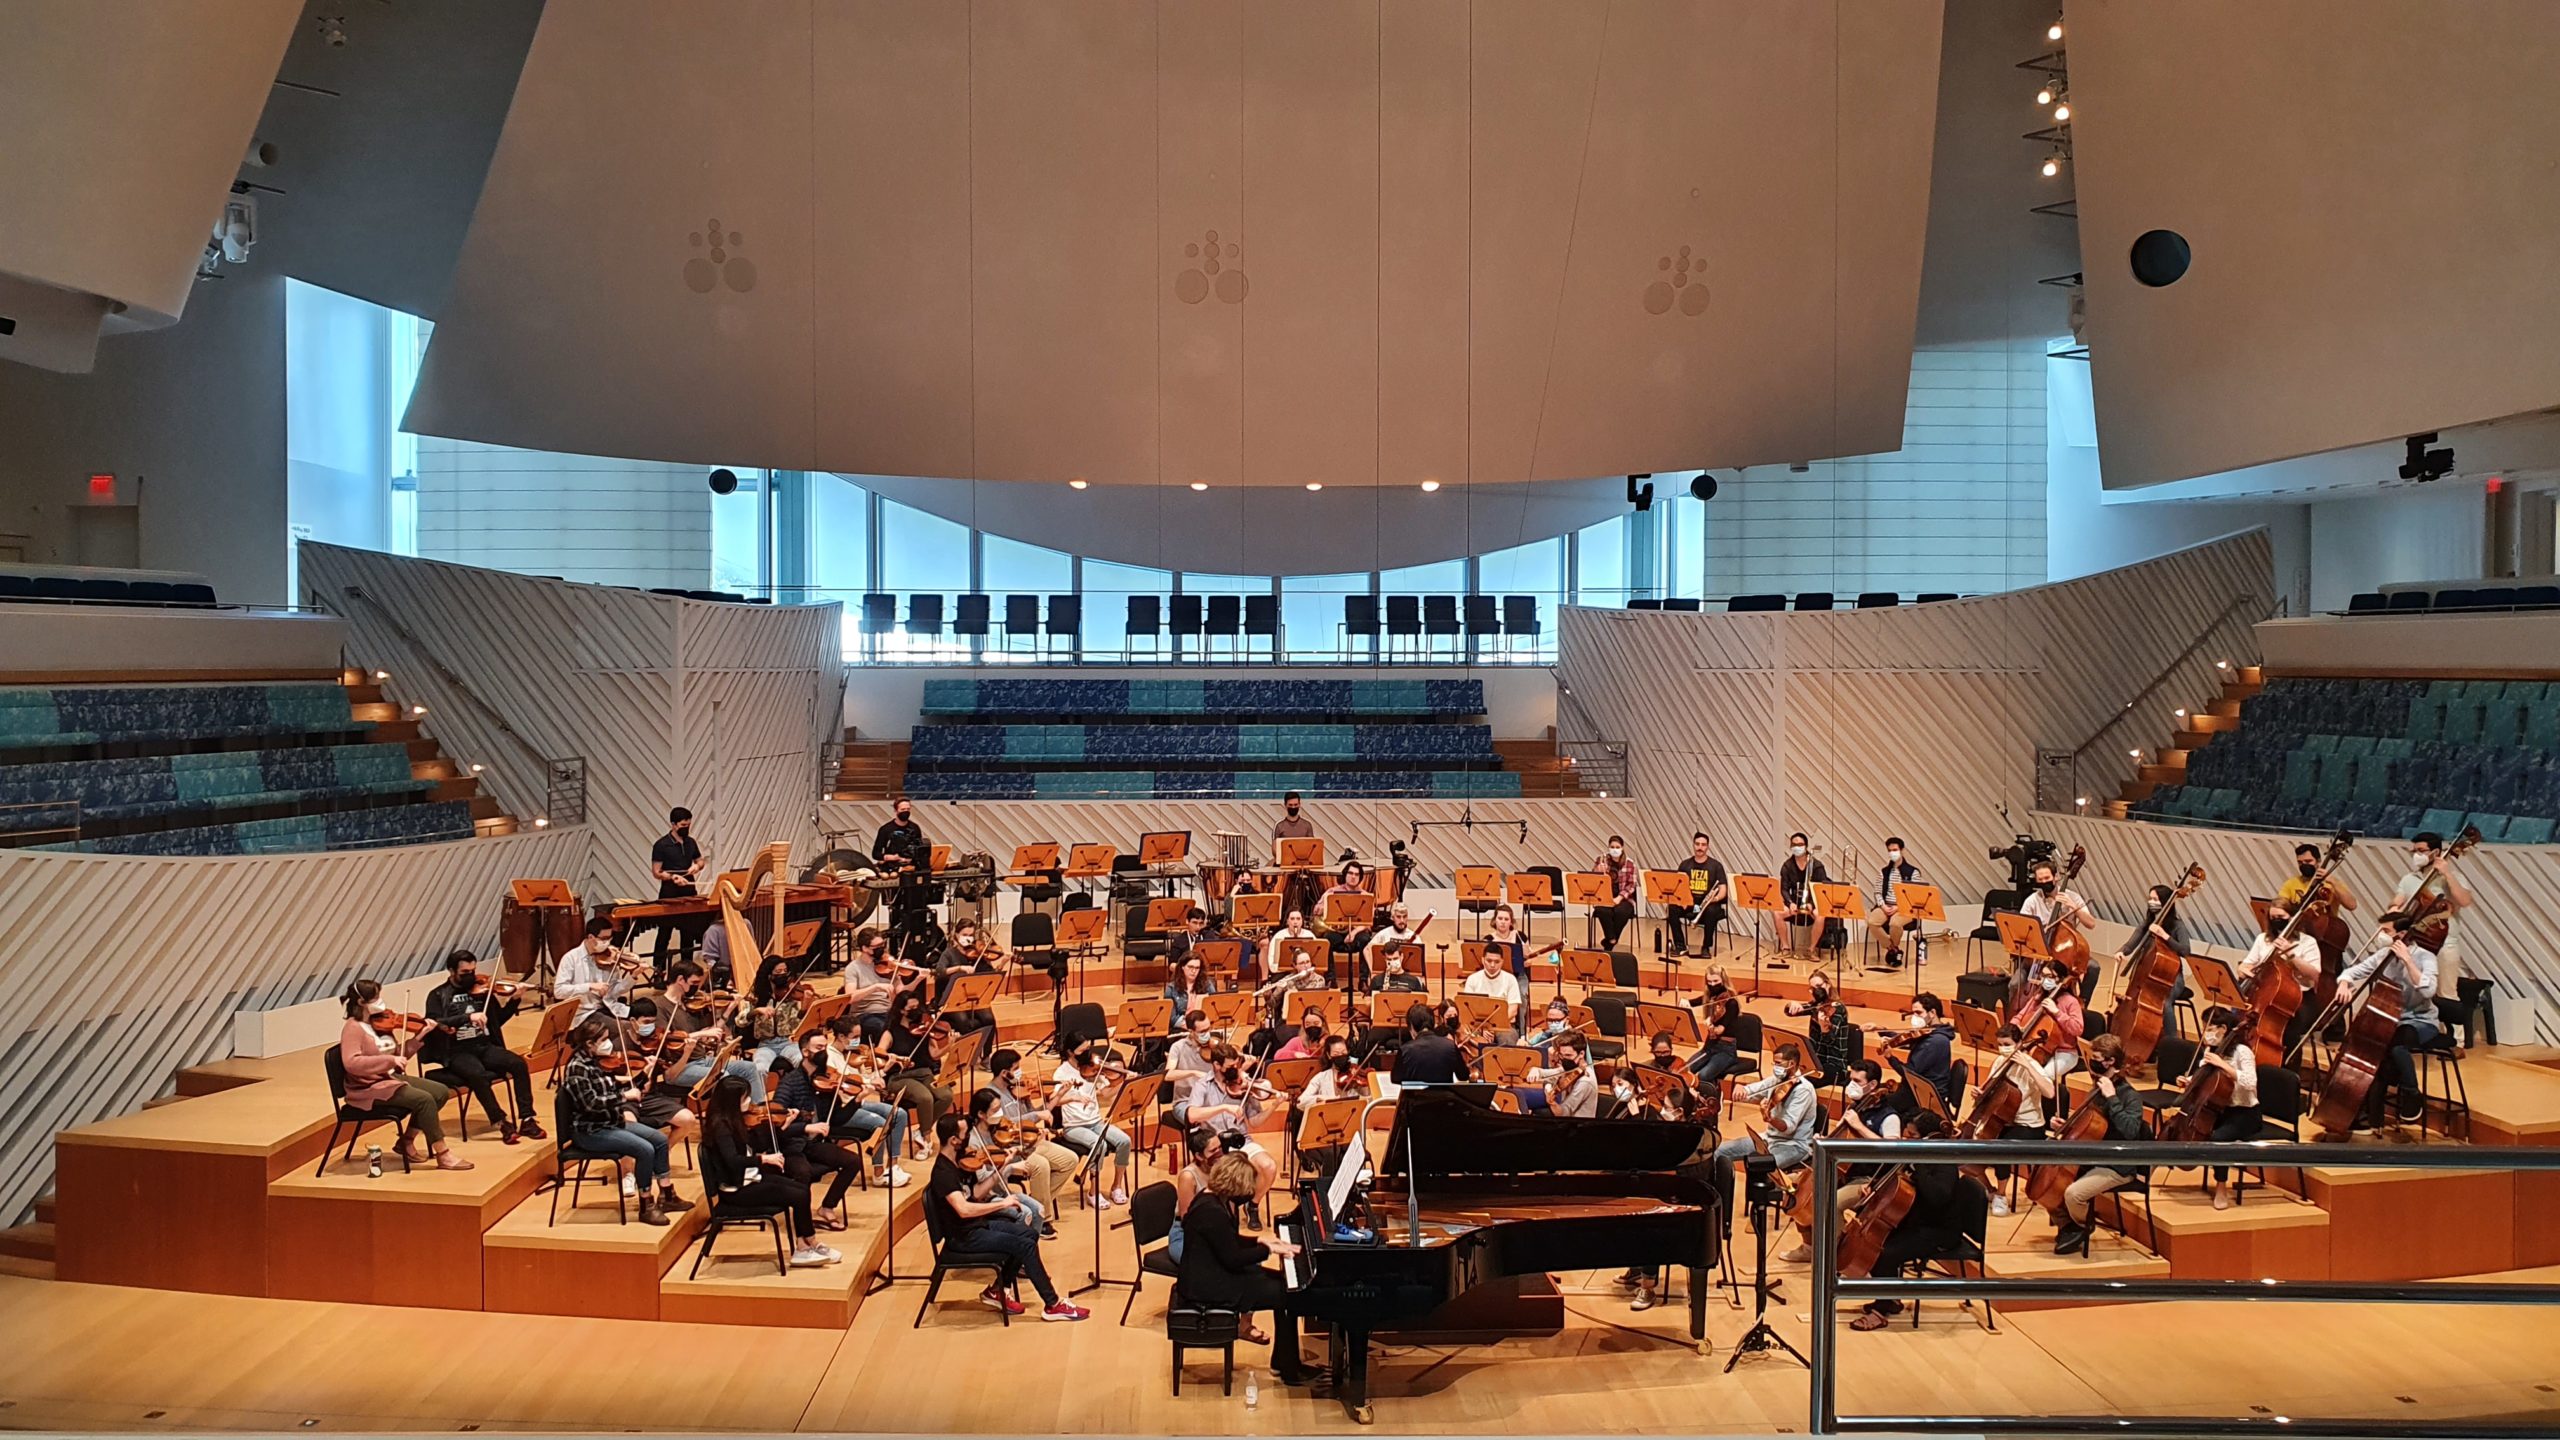
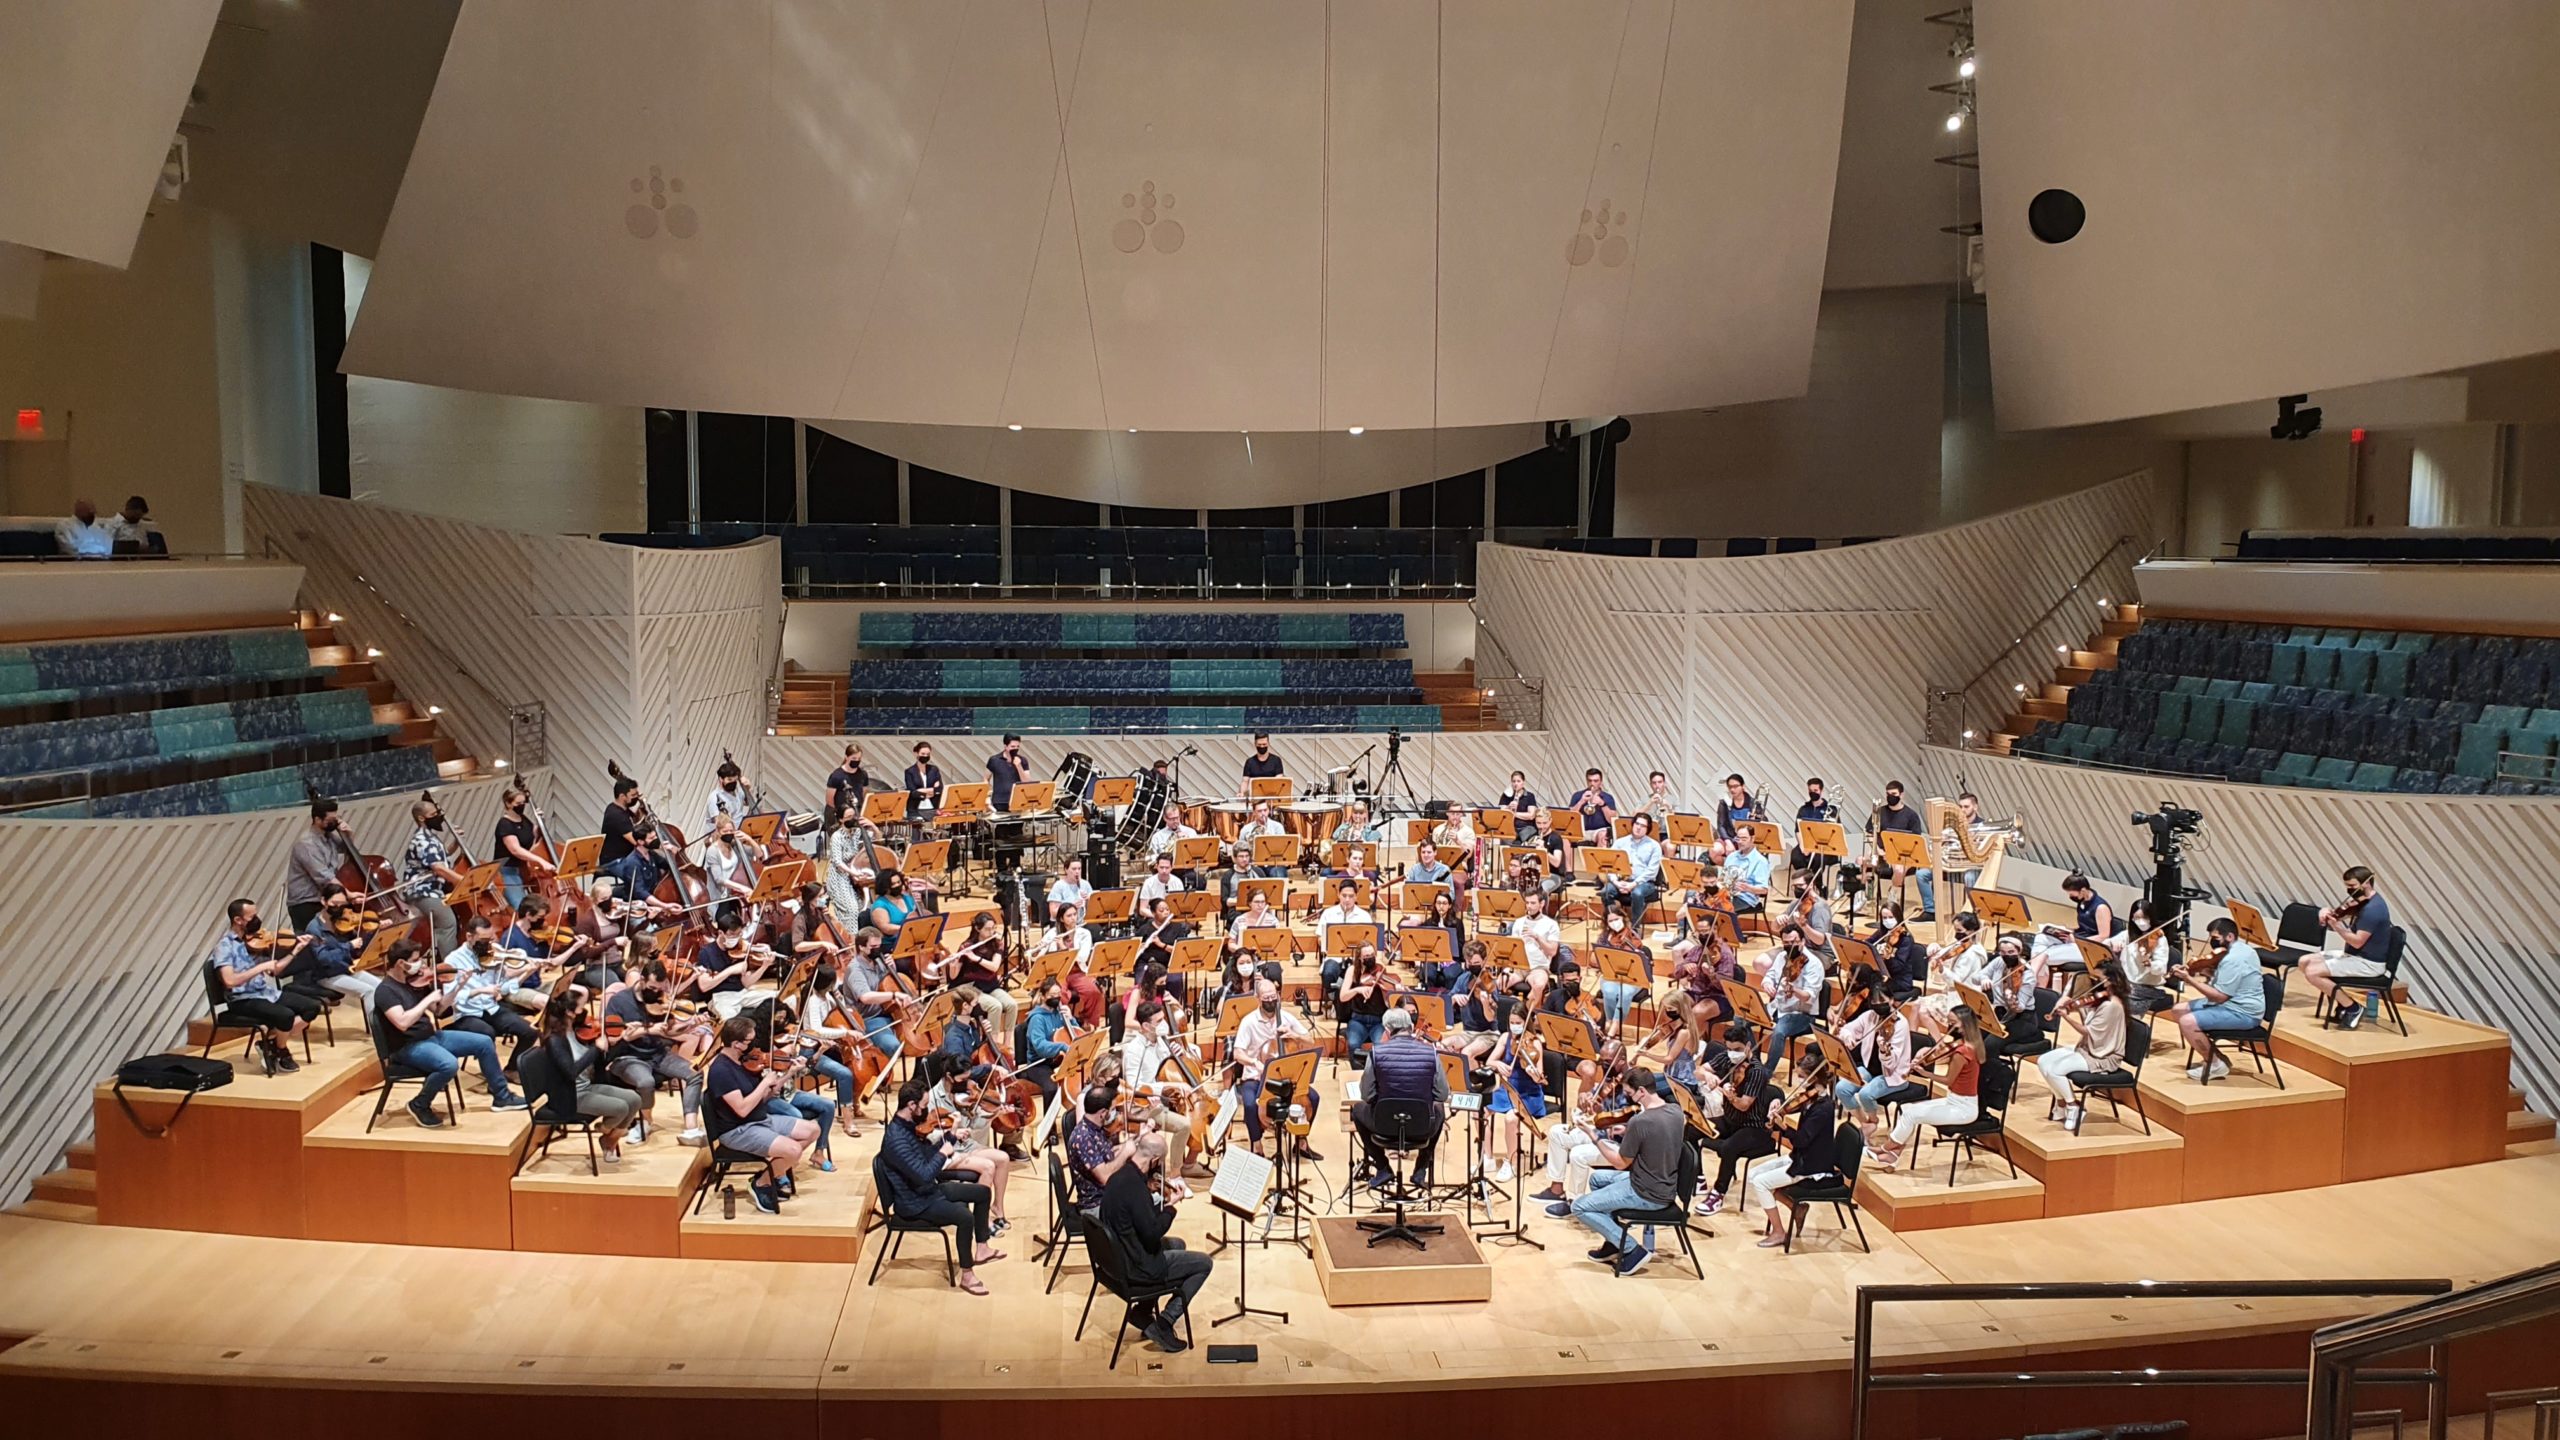
Recording an orchestra, whether for a live concert or a studio recording, can be a thrilling experience, as you have a huge range of instruments, sounds, textures, and dynamics. Your aim is to capture the orchestra’s natural sound and the surrounding acoustics and to optimise it for the listening experience. Orchestral recording is of course something that takes time to learn and obtain good results from experience. Here’s an introduction and overview of some basic aspects that are useful as a starting point.

Pre-production

It’s important to know the space that you will be recording in, as the size, shape, and acoustics of the hall or room will affect the sound and your microphone choice and placement. It’s very helpful for planning if you can find out any details in advance from the orchestra about the pieces, instrumentation, and player seating information such as stage diagrams. The type of music will also inform your microphone setup, as the sound you aim to produce will vary depending on whether it’s a concert recording, film scoring session, album recording, early music with period instruments, contemporary music with unusual instruments, etc. Getting copies of the score will be helpful to examine the instrumentation, follow along and make notes during the rehearsals and recording, and aid in editing later.

You should find out if you can hang microphones from the ceiling or if there is an existing system of hanging mic cables. There might be limitations on where you can place mics and stands if it’s a concert, or if there will be video recording. If it is a concert recording, find out if there are any other elements such as spoken presentations on handheld microphones or video projections that should be recorded. Think about whether you’ll need to move or adjust microphones between pieces. For a studio recording, a talkback system should be set up to communicate with the conductor, and you should be ready to carefully mark your takes and write notes on the score. As you’ll often be working with a large number of microphone channels, creating an input sheet is essential. For a location recording, making a list of gear to bring could be very helpful. An orchestra recording often requires 2 to 3 people, one of whom might take on a producer role to follow the score, make musical decisions and communicate with the conductor and musicians.


Instrument sections

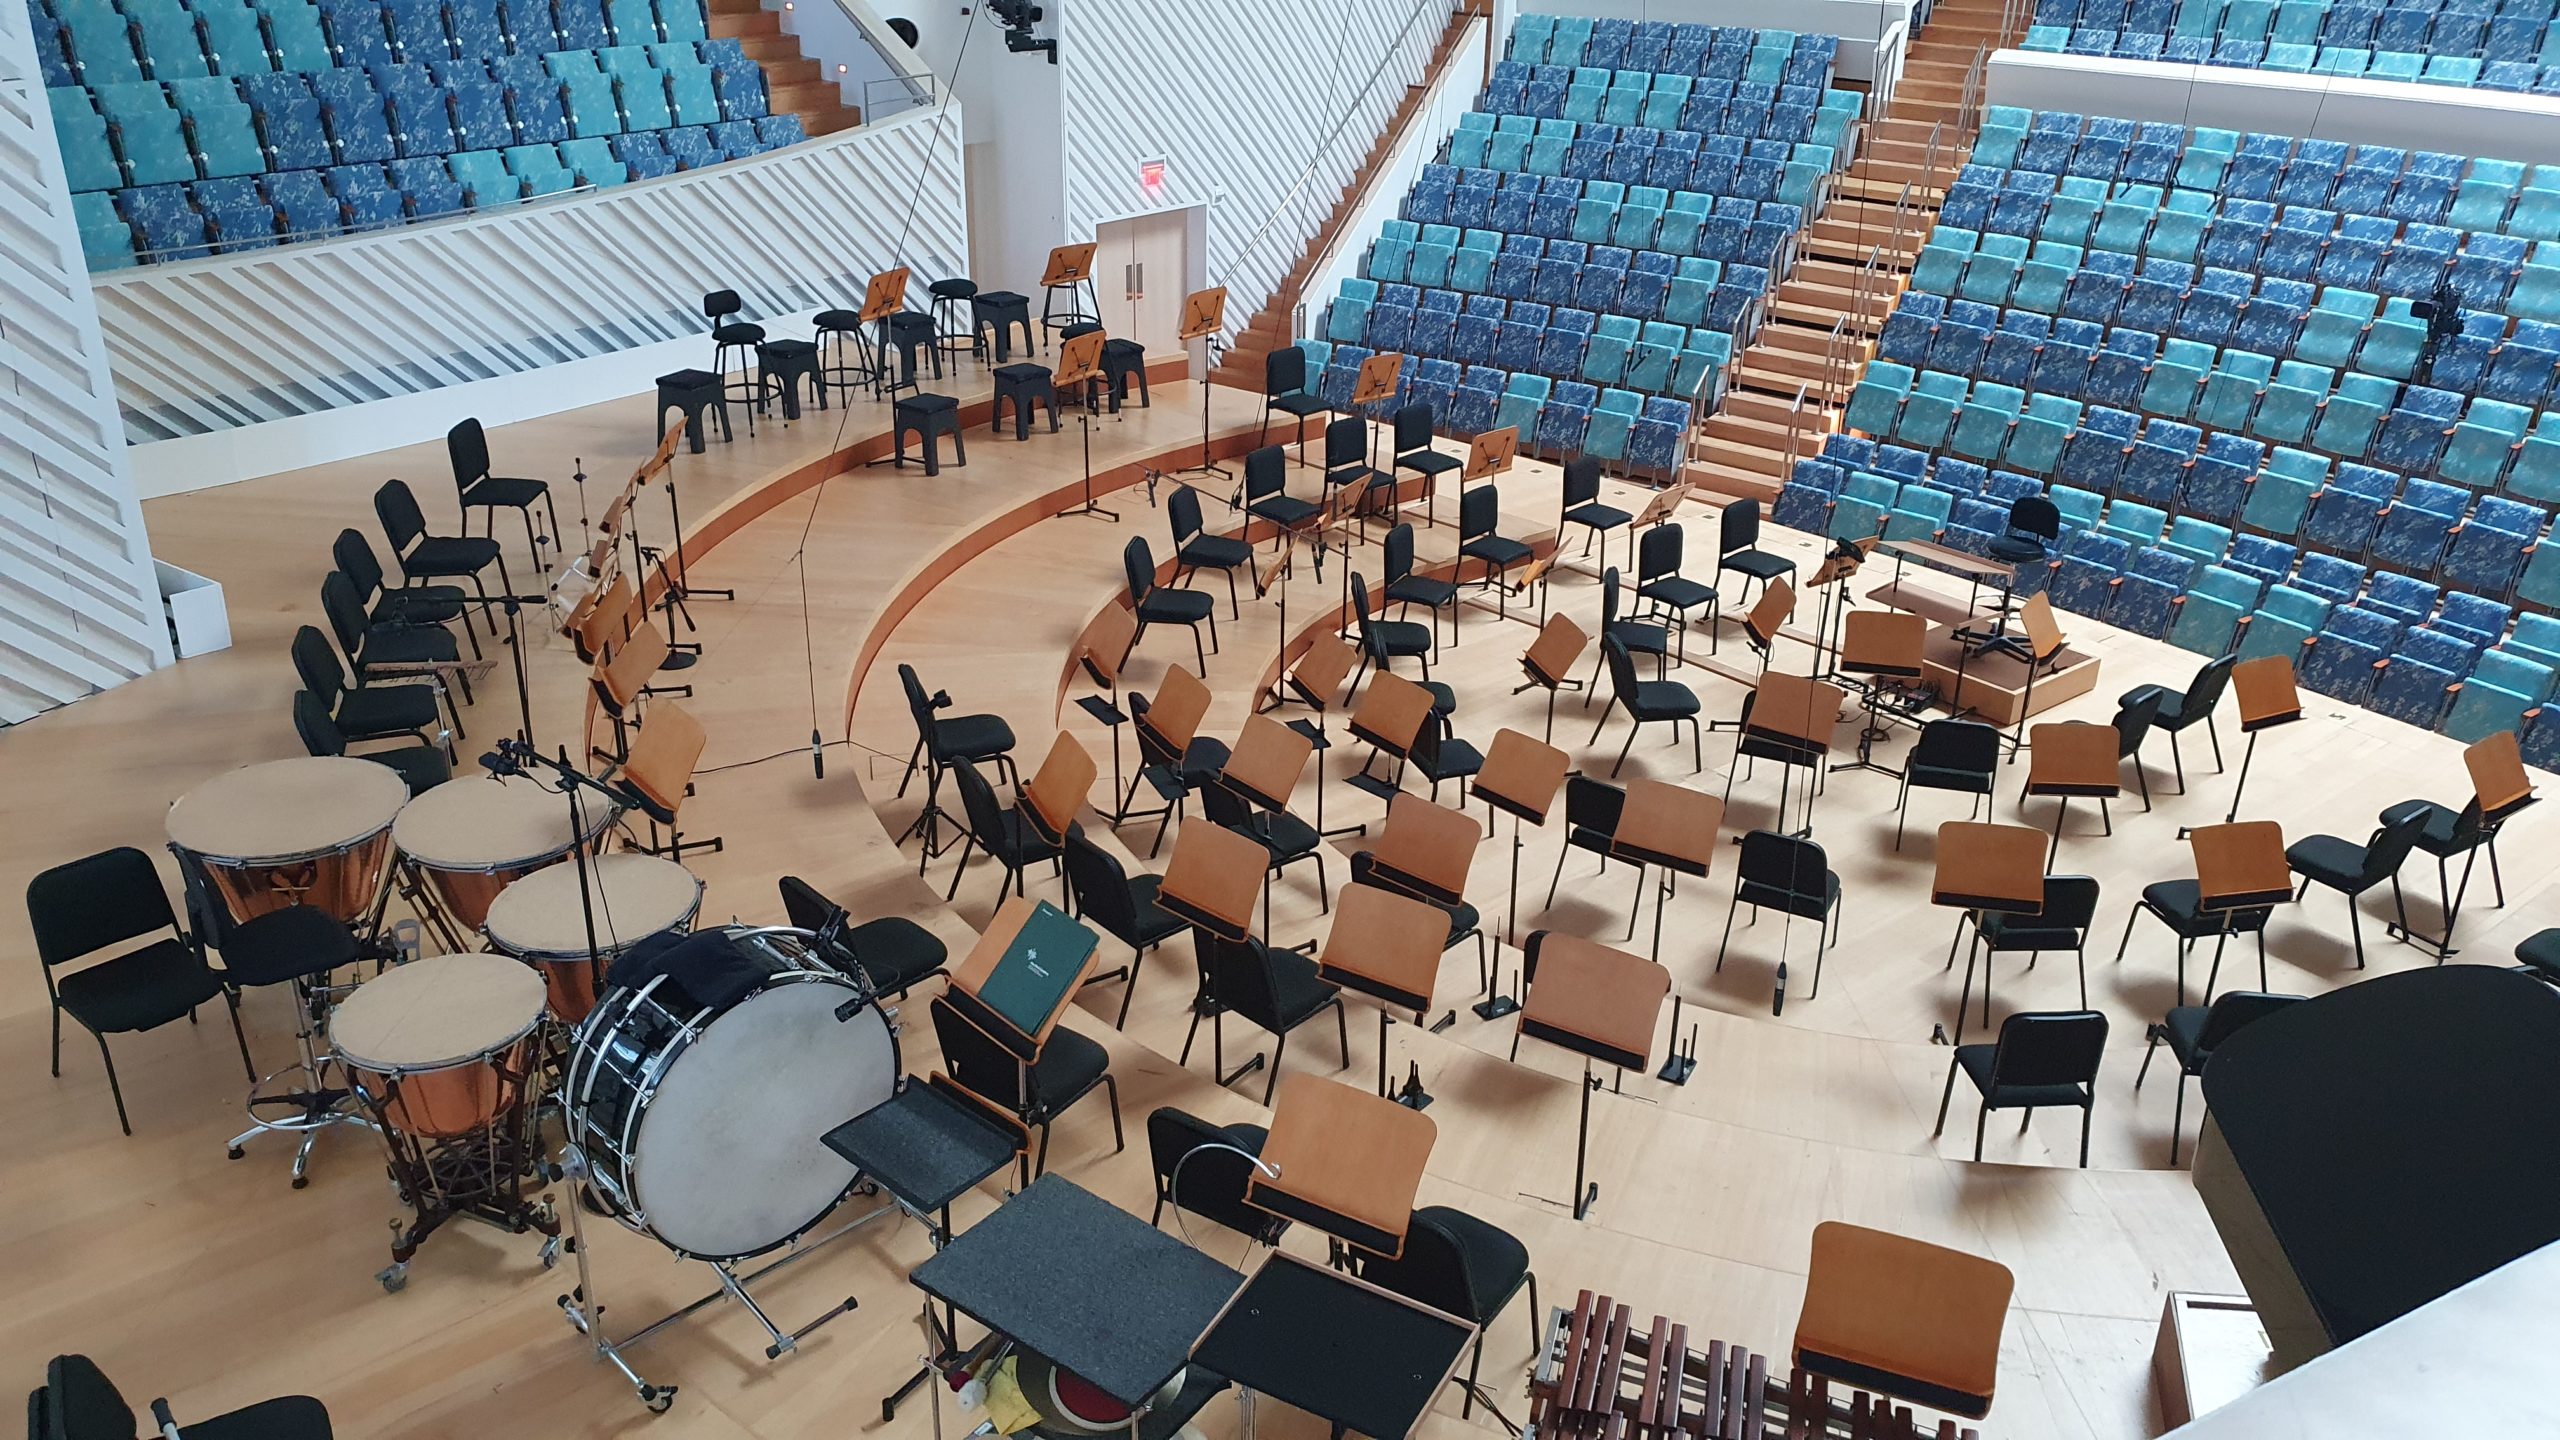
The sections of the orchestra are as follows, and the number of players will vary depending on the piece:

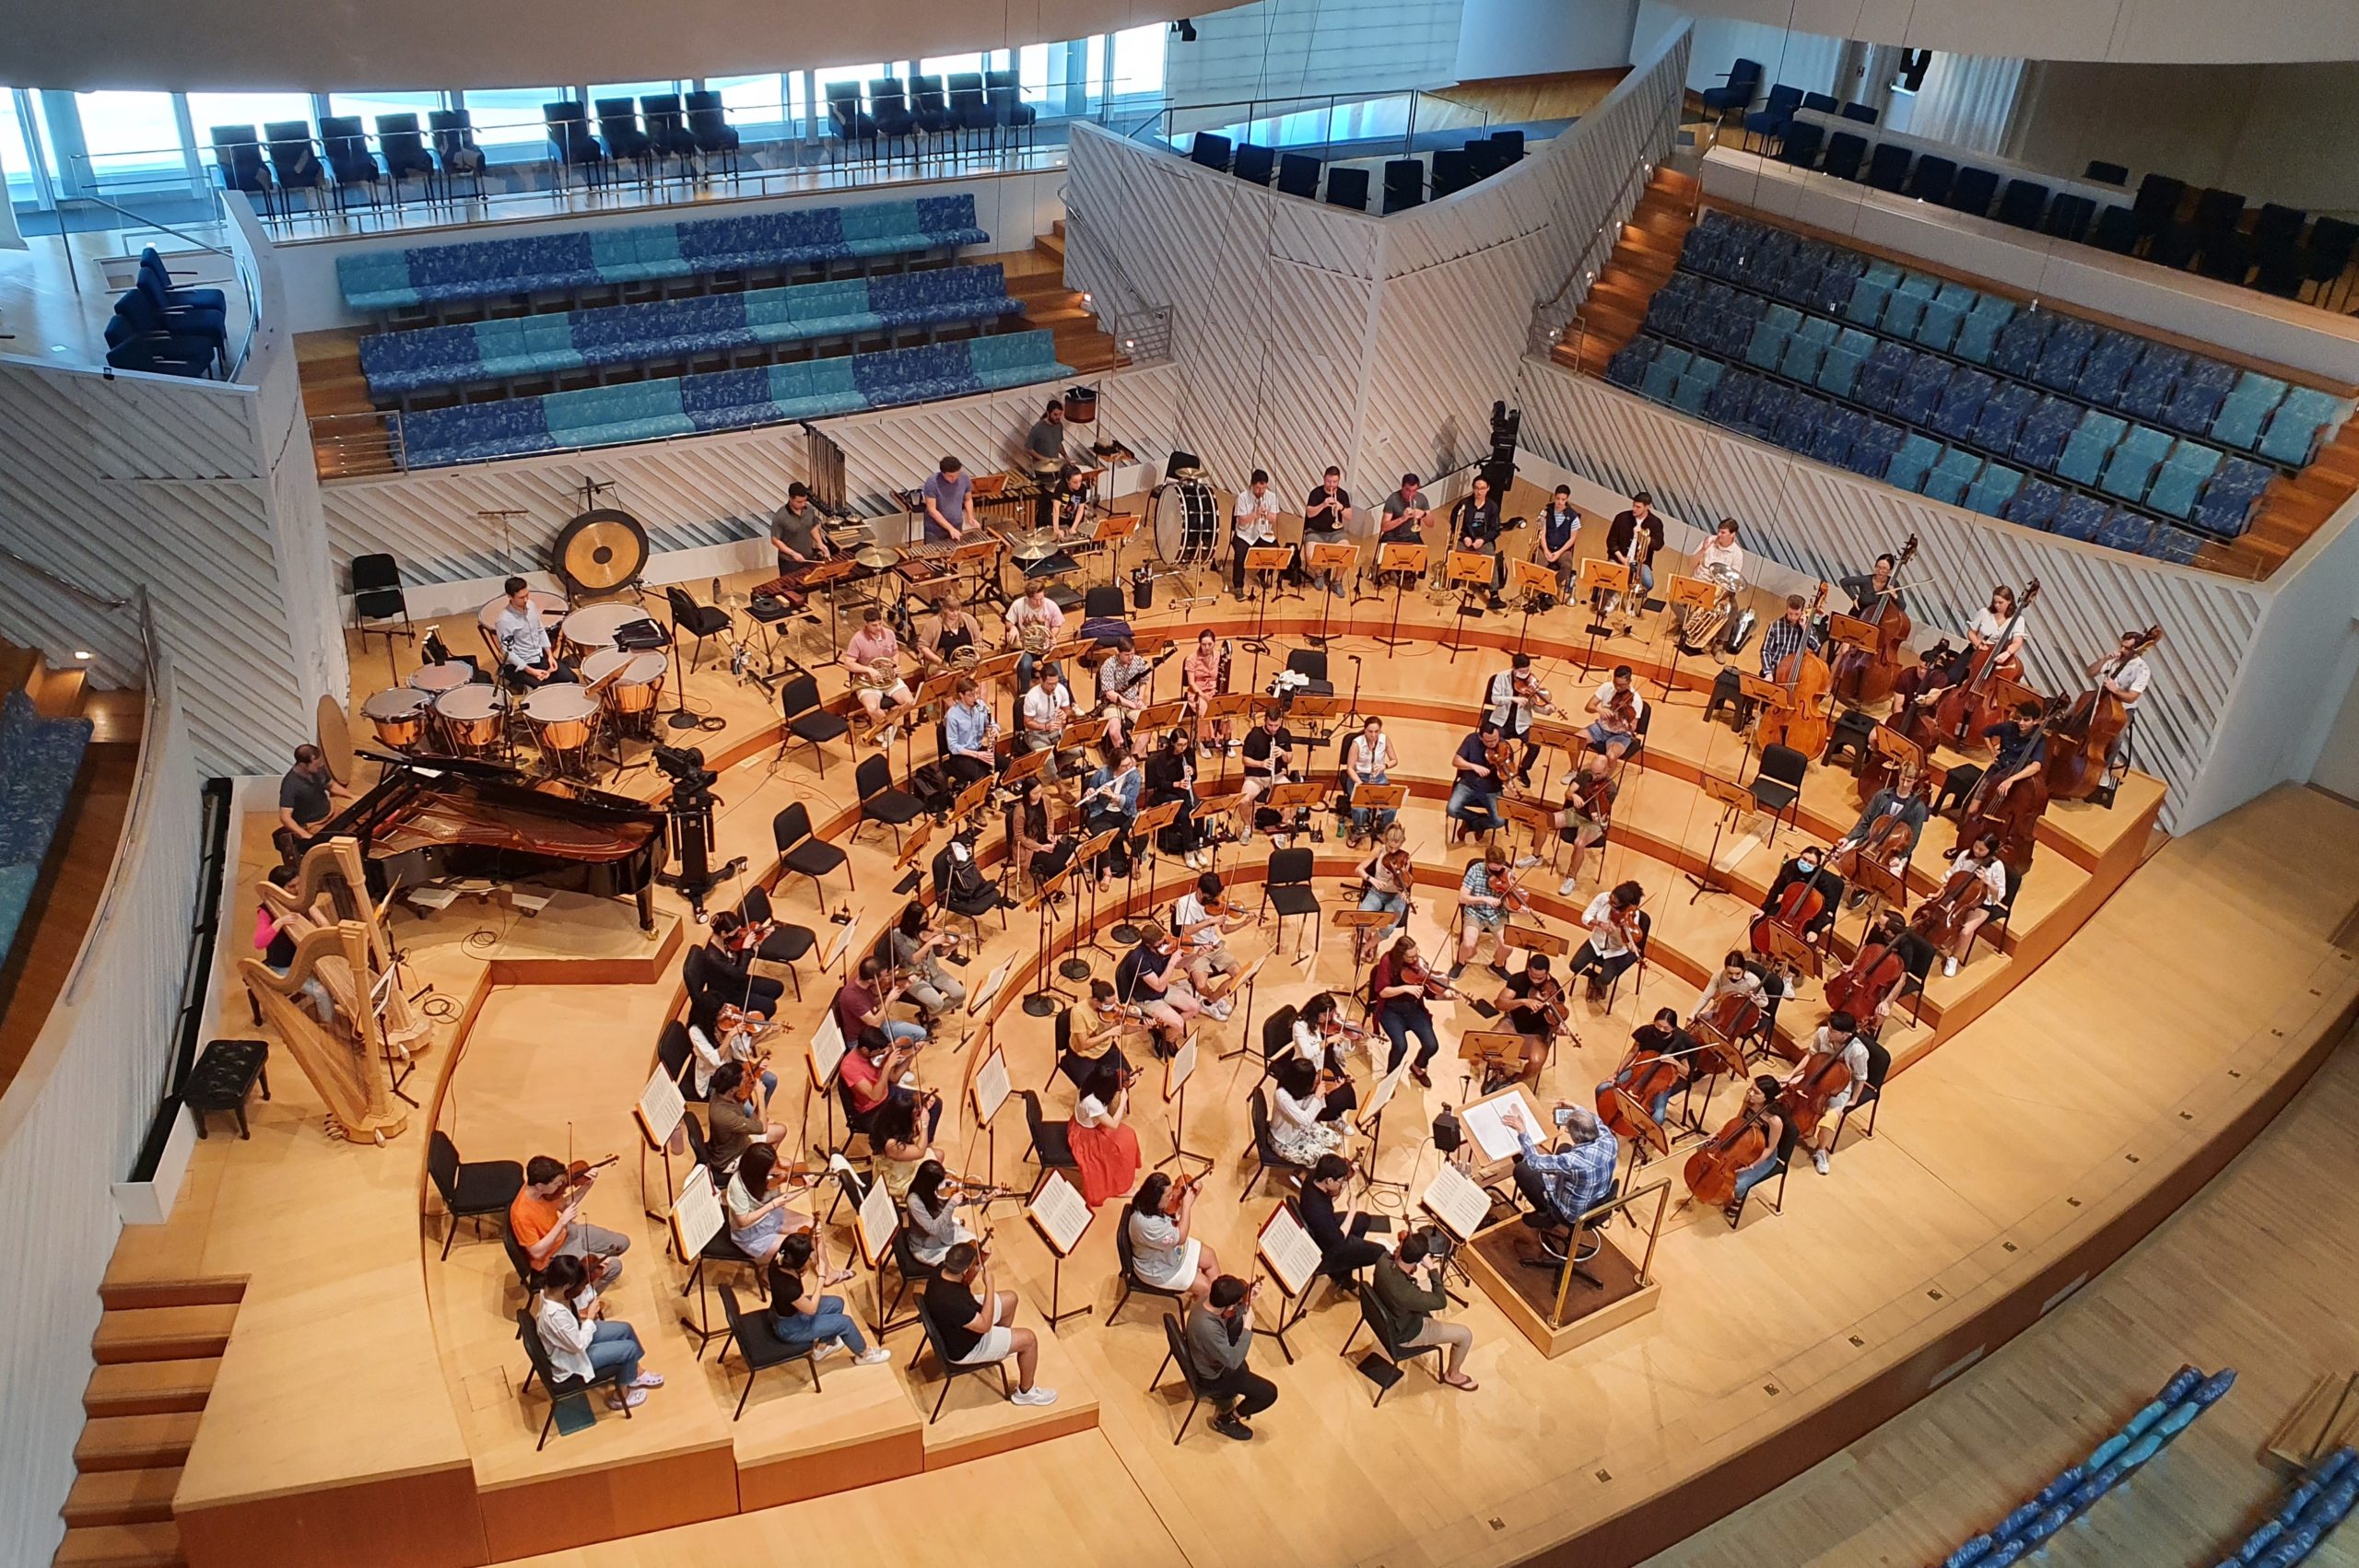
The positioning of the instruments might vary depending on the piece, the stage, and the conductor’s preference. Below are a couple of examples with two common strings setups, one with the cellos and basses on the right, and one with the second violins on the right.


Microphones and placement

Generally, an orchestra is recorded with a set of “main” microphones positioned high above the head of the conductor and the front of the orchestra, plus “spot” microphones positioned closer to certain instruments that need more detail, and often an ambient pair of microphones further away to pick up the acoustic of the space. Often microphones with quite flat frequency responses are used to capture the natural sound of the instruments. Commonly used microphones include Schoeps’ Colette series, DPA instrument mics, Neumann’s KM, TLM and M series, the AKG C414, and Sennheiser’s MKH omni/cardioid mics. Options for smaller budgets could include Line Audio, Røde, Oktava, SE, and Lauten’s LA series.

For the main omni microphone set, an AB stereo pair or a Decca Tree (or a combination of both) hanging or on a tall stand will capture a lot of the sound of the orchestra, with closer detail in the strings at the front. Two Omni microphones high on the outer front edges of the orchestra, often called “outriggers”, will pick up more of the outside strings and help to widen the image. Spot microphones in cardioid or wide cardioid could be placed on individual instruments that have solos, on pairs of players, or on groups of players. A spot mic list might commonly look like this: violins 1, violins 2, violas, cellos, double basses, flutes, oboes, clarinets, bassoons, horns (2 to 4 mics), brass (2 to 5 mics), timpani, percussion (2 to 10 mics), piano, celesta, soloist(s). A pair of Omni microphones could be placed or hung higher or further away in the hall to capture more of the hall’s natural reverb and the audience applause.

Note that depending on the acoustics of the space and the purpose of the recording, you could use very different combinations of hanging omni mics or spot mics, and you might need fewer or more microphones. The best is to use your ears and make decisions based on the sound you’re hearing!

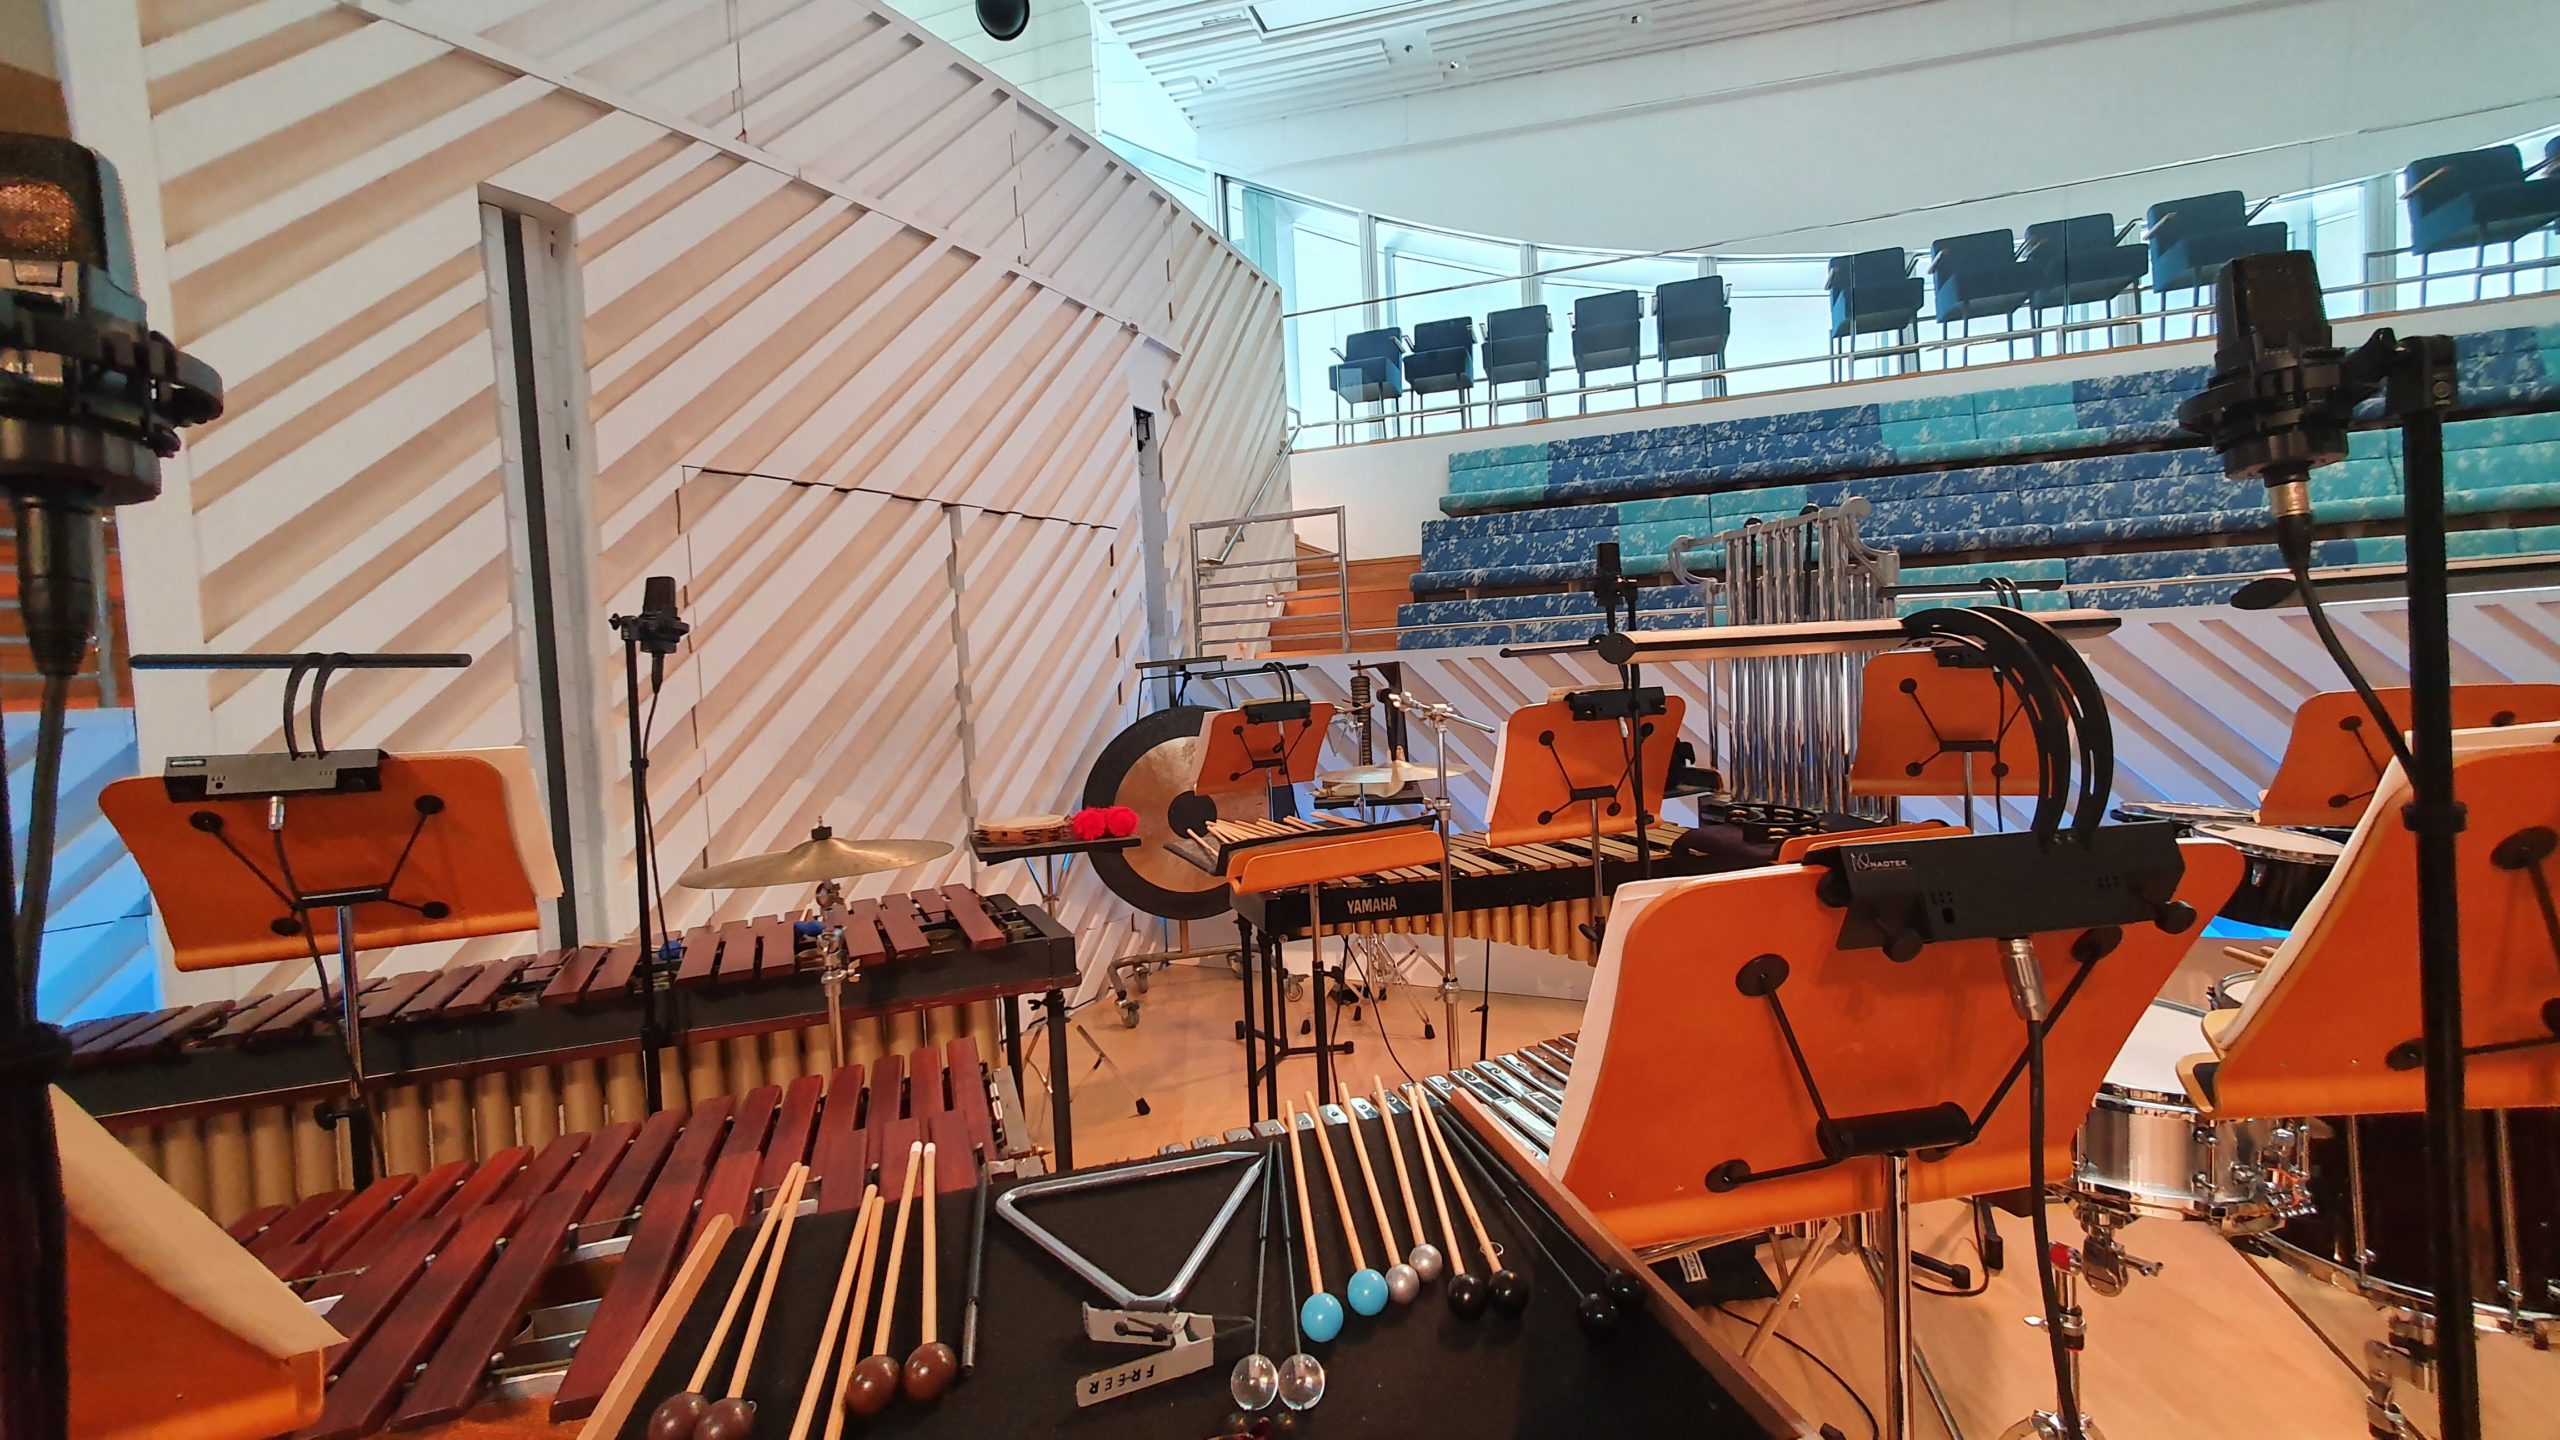
Below are examples of hanging microphones and spot microphones on stands.


Mixing

The purpose of having the main omni set, spot mics, and ambient mics is to create a good balance between the acoustic of the room and the orchestra as a whole, and the closer detailed sound of individual instruments and sections. It’s a good idea to listen to reference recordings of the pieces and to hear a rehearsal of the orchestra beforehand so you can hear the conductor’s balance of the instruments and how it sounds in the space. Compared to mixing other genres, less processing is used as you’re trying to capture and enhance the natural sound and balance of the instruments, and orchestral music has a huge dynamic range. Commonly used processing includes EQ, subtle compression on some mics, a limiter/compressor on the master channel (especially if being a live broadcast and the overall level needs to be raised), and reverb to enhance the natural acoustic. Some reverbs favoured by classical engineers are Bricasti, Nimbus, Altiverb, and Seventh Heaven. Some engineers measure the delay between the spot mics and the main mics and input it into the DAW to time align the signals – you can decide whether this improves the sound or not. If doing a live mix, following the score is useful to anticipate solo parts, melodies, and textures that would be nice to highlight by bringing up the level of those spot mics. A fader controlling all mics could be used to subtly bring up the level in sections that are extremely quiet, especially if for broadcast. If mixing in post-production, automation or clip gain can be used to enhance solos and dynamics.

Surround sound and Atmos mixes are now being explored by many orchestras and audio engineers, often with the addition of specifically placed surround mics or sometimes as “up mixes” using the existing stereo microphone setup.


Editing

Unlike many other genres of music recording, editing a classical recording is done linearly on your timeline, cutting, pasting, and moving all tracks together. For a studio recording, you’ll likely have many takes to piece together. For a concert recording, some orchestras might request that the best parts of several concerts or rehearsals are edited together. Commonly used DAWs for orchestral recording are Pyramix and Sequoia, which have features convenient for large track count recording and editing. Source-destination editing allows you to easily listen to several takes and select the best parts to send to a destination track with a separate timeline, using in and out points. When editing several takes together, it’s important to use crossfades to make edits inaudible, and make sure the tempos (speed), dynamics, and energy of the music match when they are edited together. Some conductors and musicians like to schedule a listening and editing session with the engineer after a first edit has been made, while others like to receive an audio file and send back a list of feedback and suggestions for edit changes.


Further learning

If you’d like to go deeper into orchestral and classical music recording and mixing, a great resource is the book Classical Recording: A Practical Guide in the Decca Tradition. The DPA Mic University website also has useful articles about orchestra and classical instrument recording.

Photos were taken by India Hooi.

Ready to start your own Recording and Music Production Studio?

Are you thinking about starting your own business as a recording studio or music producer?

Have you recently finished audio school or interning? Have you simply been recording and producing on your own for a while, but are hesitant to go into business for yourself?

It can be intimidating or outright terrifying to think about putting up your virtual “open for business” sign as a freelance audio engineer or music producer. I totally understand! I had been teaching voice and songwriting lessons for 15 years but had only been “dabbling” in recording and production for a few years. I was terrified when I moved to a new city with no contacts and publicly announced that I was a recording engineer and music producer. At that moment in time, it was sink or swim. I had to buckle down and do it or I was going to have to go find a regular day job.

Now that my production business has been thriving for about 12 years, I’ve learned a few things! I came up with  8 tips that should help you get started today.

Create a business entity.

The easiest way to establish a business in the US is to start a sole proprietorship. Check your local city and state requirements, but it should be very simple using your social security number and home address. There are other entity options if you think you may have a more complicated situation, so be sure to check with your tax accountant to figure out what is best for you. In most cases, however, keep it simple and set it up as a Sole Proprietor and establish a “Doing Business As” or DBA. If you have a studio name or producer name you’ve been dying to use, make it official!

Establish your brand around your strengths and talents.

There are a lot of recording studios and a lot of producers. What sets you apart? What areas are you feeling really confident in? Focus on those areas and build your brand around them. Since I was a voice teacher when I started to learn how to record and produce, I started working with my students on their songwriting and creating demos to present to their producers. We did mock recording sessions to prepare them for their real recording sessions in the studio. After doing this for a number of years, I began recording the vocals for their final projects, eventually learning to edit them, mix them and do all vocal production. It was a process that took me several years but I was proficient with vocal production long before I knew how to mix a drum kit. What could be your niche? Are you a guitar player so you really know how to dial in tones? Are you an expert at micing up a drum kit? Create your niche around what you do best while you continue to build your knowledge in the areas you are less confident. As soon as you feel confident in other areas, shift your messaging and your brand to include it.

Create your client avatar around the niche you’ve established.

Now that you know what your niche will be in the recording and/or music production business, figure out your client avatar; what is their age, gender, what are their insecurities, and what are their problems you can solve? Will they all be remote or all local or a combination? All of your messaging and marketing; from your website copy to your photos should appeal to this client avatar.

Take yourself seriously.

You’ll be tempted to charge the lowest rate possible, work the craziest latest hours, and bend over backward to please clients that are never happy, just to bring in work. Knowing your value, in whatever niche you decide to focus on, and presenting yourself that way will attract people who are willing to pay what you are worth and respect your time and talent. Keep your rate competitive but shine in other areas, such as attention to detail, turn-around time, professionalism or just being fun.

Make your studio a comfortable, professional space with a vibe that makes you happy.

Do your best to present your space as professional and comfortable. Especially if you have clients coming to your home studio, make sure that it’s clean and presentable and as disconnected from “family living” as possible. I understand it’s not always possible to make a home studio feel like it’s not in your home. Believe me, I’ve had a variety of home studios and some situations were more ideal than others. Two studios ago, clients had to walk through the living room, kitchen, and family room to get down to the studio. Ugh! I hated it, but it was the only option at the time. I always kept the house as clean as possible (with teenagers….it wasn’t always easy!) And remember, this will be your “workspace” which is why you want to create a space and vibe where you are happy. If it’s adding plants, lava lamps, LED lights or whatever, do it a little at a time and make it your “happy place”.

Set up your website with testimonials and portfolio.

Marketing 101 advice is to have your own website because platforms such as Facebook and Instagram are just rentals. You do not have a direct connection with your clients or potential clients on social media. Every business should have a “home base” where people can come and get a clear picture that you are legit. Grab a domain with your business name that you’ve registered using GoDaddy. The annual fee to own this domain is relatively cheap. As soon as you have even just a few songs that demonstrate your abilities and a few happy clients, create a website (use a simple website-building platform such as Wix or Squarespace). Remember to keep the website simple. It could even be one page. Make a simple statement about who you are and what you can do for your client avatar, a professional picture, a few testimonials and a playlist widget featuring your work.

Start your email list.

This is how you connect with your audience and potential clients. Use a free email marketing program such as Mailchimp to add a “subscribe” widget to your website. Begin building this list and send updates once a month. These don’t need to be time-consuming or extravagant. What this does is it builds your authority and lets people who stop by your website know, “Oh, this person is serious.” Provide value to this audience and nurture it. Ask them to reply to questions so you can better understand them. Be real in your messages so that they feel like they can trust you.

Conduct yourself like a professional in all aspects of your life.

Keep the angry rants at your mother or ex off of social media. If your branding is political, keep it professional and “kind”. Go to networking events and shake people’s hands. If you “cold call/message” potential clients, do not spam them with copy/paste messages. If a client decides not to work with you or isn’t happy with your work, be humble and understanding. If given the opportunity, ask them what they were unhappy with and listen, rather than get defensive. Do not gossip or talk badly about others in your field.

That’s it! See, it’s not really that hard at all. I hope this was helpful and that you can ROCK your own Recording Studio/Music Production Business!

Creating Your Mission Statement as a Creative Entrepreneur

As a creative person, it can be a pretty big shift to think like a business owner. Entrepreneurial instincts aren’t exactly natural for all of us, just as musicality isn’t as natural for some as others. As I’ve worked with artists, songwriters, musicians and creatives of all kinds, I’ve found that creating a “mission statement” of sorts can get the ball rolling into a disciplined music business that is an authentic reflection of who you are.

“Authentic” is a word that’s a bit overused these days, however finding and embracing your authentic self as a creative entrepreneur in today’s world is perhaps the most important part of your journey to finding success. As an artist, it is what will draw fans to you and keep them there. As a music producer or audio engineer, authenticity builds trust and loyalty with your clients. As a songwriter, telling stories from a place of authenticity will keep your music fresh and relatable.

In the “authentic only” environment we have today, posers or fakers are relentlessly called out, and then inevitably, virtually crucified. That being said, the driving force behind finding your authenticity shouldn’t be fear, but a desire to find your place in this musical landscape and to find the people who feel they belong there with you; to create your own world and invite your “people” to join you. This is the very foundation of being a successful creative today.

Yes, there is still room for showmanship and even gimmicks, as long as it’s an extension of who you really are. I just had an interesting conversation with an artist about this. I was convinced he was making a choice with his branding that was confusing and off-putting. By the end of our conversation, I “got it”. I could clearly see that what wouldn’t work for most artists was perfect for him, as it reflected his rebellious spirit and a virtual finger to the establishment. He sold me on it because his feet were so solidly planted in his “authentic” self that I could see without a doubt that he wasn’t simply being stubborn, but was completely confident in who he is and has a clear vision of how he wanted people to experience his brand.

Finding who we are can be a process of digging, questioning, discovering, and peeling back layers. It should always start with these four questions:

Take about 20 or 30 minutes to sit with these questions without distraction. Brain dump your answers with no filter on a piece of paper or note app.

Now, shape the answers to these questions into your official mission statement. Your mission statement should only be a paragraph long, not a full-page essay. If writing isn’t your skill set, ask for some help. Also bear in mind that it doesn’t have to be perfectly written, only that we the reader should have no questions about who you are, what you stand for, and what your “mission” with your music is.

Going forward, every move you make (on social media, in your fan newsletter, in your youtube engagement, or wherever) as a creative should align with your mission statement. If you contradict yourself one too many times, your fans will detect this lack of authenticity and lose interest. They may even question why they liked you in the first place. This should make it easy for you! You never have to worry about what someone else is doing or what the current trends are. Just Be YOU!


Eight Tips for Getting Started Mixing in any DAW.

If you’ve spent any time recording in your DAW, you are certainly aware by now how hard it can be to get things to actually sound good. As soon as you do a little Youtube search to get some help, you’ll find hours and hours of tutorials ranging from the very basic steps to master-level mixing. Where does one even start figuring it out?

I decided to write up my own basic mixing tips for anyone who knows how to record but just can’t seem to get things to sound good yet. These are easy, baby steps that work in any DAW. I hope it’s helpful!

Bring the level of every track down to at least -10db to -15db. Your Master Bus should remain at 0 dB. This is part of what is called “gain-staging” and it basically means that you need to always be conscious of not crowding the ceiling of your mix. If every track is at zero (the loudest) then you will only hear a crowded, jumbled, even distorted mess once all the tracks are there. What often happens is the first track that is recorded stays at zero. Let’s say that the first track is an acoustic guitar track. Now you’ve recorded a vocal. You want the vocal a little louder than the acoustic so you turn up the vocal 2db. Before you know it, you are running out of headroom fast. So, if you start out by bringing everything down at least -10 to -15 db, you’ll give yourself the headroom you need to turn things up or down as you build out the production.

Organize your tracks into folders. Categorize them into groups, such as; lead vocals, backing vocals, drums and percussion, electric guitars, pads, keys, etc. Staying organized will allow you to focus on the more technical aspects of mixing.

Create sub-mixes or buses. These should be grouped according to how you want them to be mixed. I usually have a submix for all lead vocals, and a few different categories of backing vocals (stacks, gang, texture, etc.) Drums and Percussion, Electric Guitars, Acoustic Guitars, Bass, etc. The sub-mixes should be instruments that belong together and you want to mix them as a group. I will mix electric guitars and acoustic guitars differently, for example. So even though they are both guitars, I will create a submix for each. I approach backing vocals the same way.

Try some basic panning. Panning is the “left to right” spacing of sounds in the stereo field (my own definition, probably not textbook!) Generally speaking, your lead vocal, snare drum and kick drum, and bass are all straight up the middle, in the center. Everything else is fair game! Play around with spacing individual tracks throughout the stereo spectrum. You’ll be amazed at the difference in sound you’ll get by doubling (not cloning or duplicating the track but recording a second pass) certain instruments and panning one hard left and the other hard right. Try this with electric and acoustic guitars as well as with backing vocals.

Don’t be afraid to use presets. In the mixing world, presets are frowned upon. Apparently, it’s only for noobs. If you are a noob, then use them! When you are learning how to mix, presets can be incredibly helpful as a starting point. They can also help your ears hear the difference between different settings. I still use presets as my starting point on a few things. I tweak from there until I dial it in. Eventually, your ear will be trained enough to dial in your own settings from scratch, if you want. But if the preset provides you with a great starting point, why not use it? You can also save your own presets, so once you do get comfortable dialing in your own EQ settings on a lead vocal, for example, you can save your settings as your own preset!

Use EQ instead of the volume knob/fader. If something is too loud or too soft, the volume knob may not be the solution. Try using eq and find a specific preset and see if it helps an instrument to pop out more or not stick out as much.

Use inserts for a reverb (make sure the plugin itself is completely wet) then dial up or down the insert level. You can do this on your buses as well which helps add cohesiveness to a group of instruments. It helps all of your instruments sound like they are living in the same space.

Focus on learning one mixing tool at a time. There is a lot to learn and it all takes time and practice. The fundamentals are EQ, compression, reverbs, saturation, and chorus. Each of these fundamentals has a string of other tools and techniques. De-Lessing vocals, parallel compression, side-chaining, and so on. It’s easy to get overwhelmed once you dive down even one of these fundamentals. Pick one at a time, take some courses, or find tutorials for that specific tool and move on once you feel confident.

Learning to mix is much like learning a new instrument. If you approach it like learning an instrument, then you understand and respect the amount of dedication it takes to improve. Start with these basics and I promise, you’ll start to gain confidence and your mixes will start to sound legit.


X